
UAT release
This guide describes the upcoming portal update. Some screens or actions may differ in the current UAT portal.
Solar Developer Admin Guide
Who is this for: Company Administrator (Developer ADMIN) Platform Administrator (assisting with VPN & serial confirmation)
Prerequisites:
- Signed in with a Company administrator account in a Solar developer organization (created by your Platform Administrator).
- Legal entity details for invoicing (13-digit Tax ID, registered address, company logo, and transparent PNG authorized signature).
- Off-taker customer details, PPA contract terms (tariff, discount, cut-off day, payment term), and meter network/CT/VT specifications.
1. Company Profile, Logo & Digital Signature
Clicking Settings in the sidebar opens your Solar Developer workspace directly.
- Open the Company information tab.
- Click Edit company profile.
- Update the legal and billing fields shown on invoices and tax documents:
- Company name (Thai) and Company name (English)
- Tax ID (13 digits)
- Phone (shown on invoices) and Billing email
- Head office address (shown on tax invoices)
- Under Authorized signatory and digital signature:
- Enter Authorized signatory name and Signatory title.
- Click Upload signature (PNG/JPG) (use a transparent PNG for crisp rendering on invoice PDFs).
- Click Upload logo to attach your company logo (PNG, JPG, or WebP).
- Click Save changes.
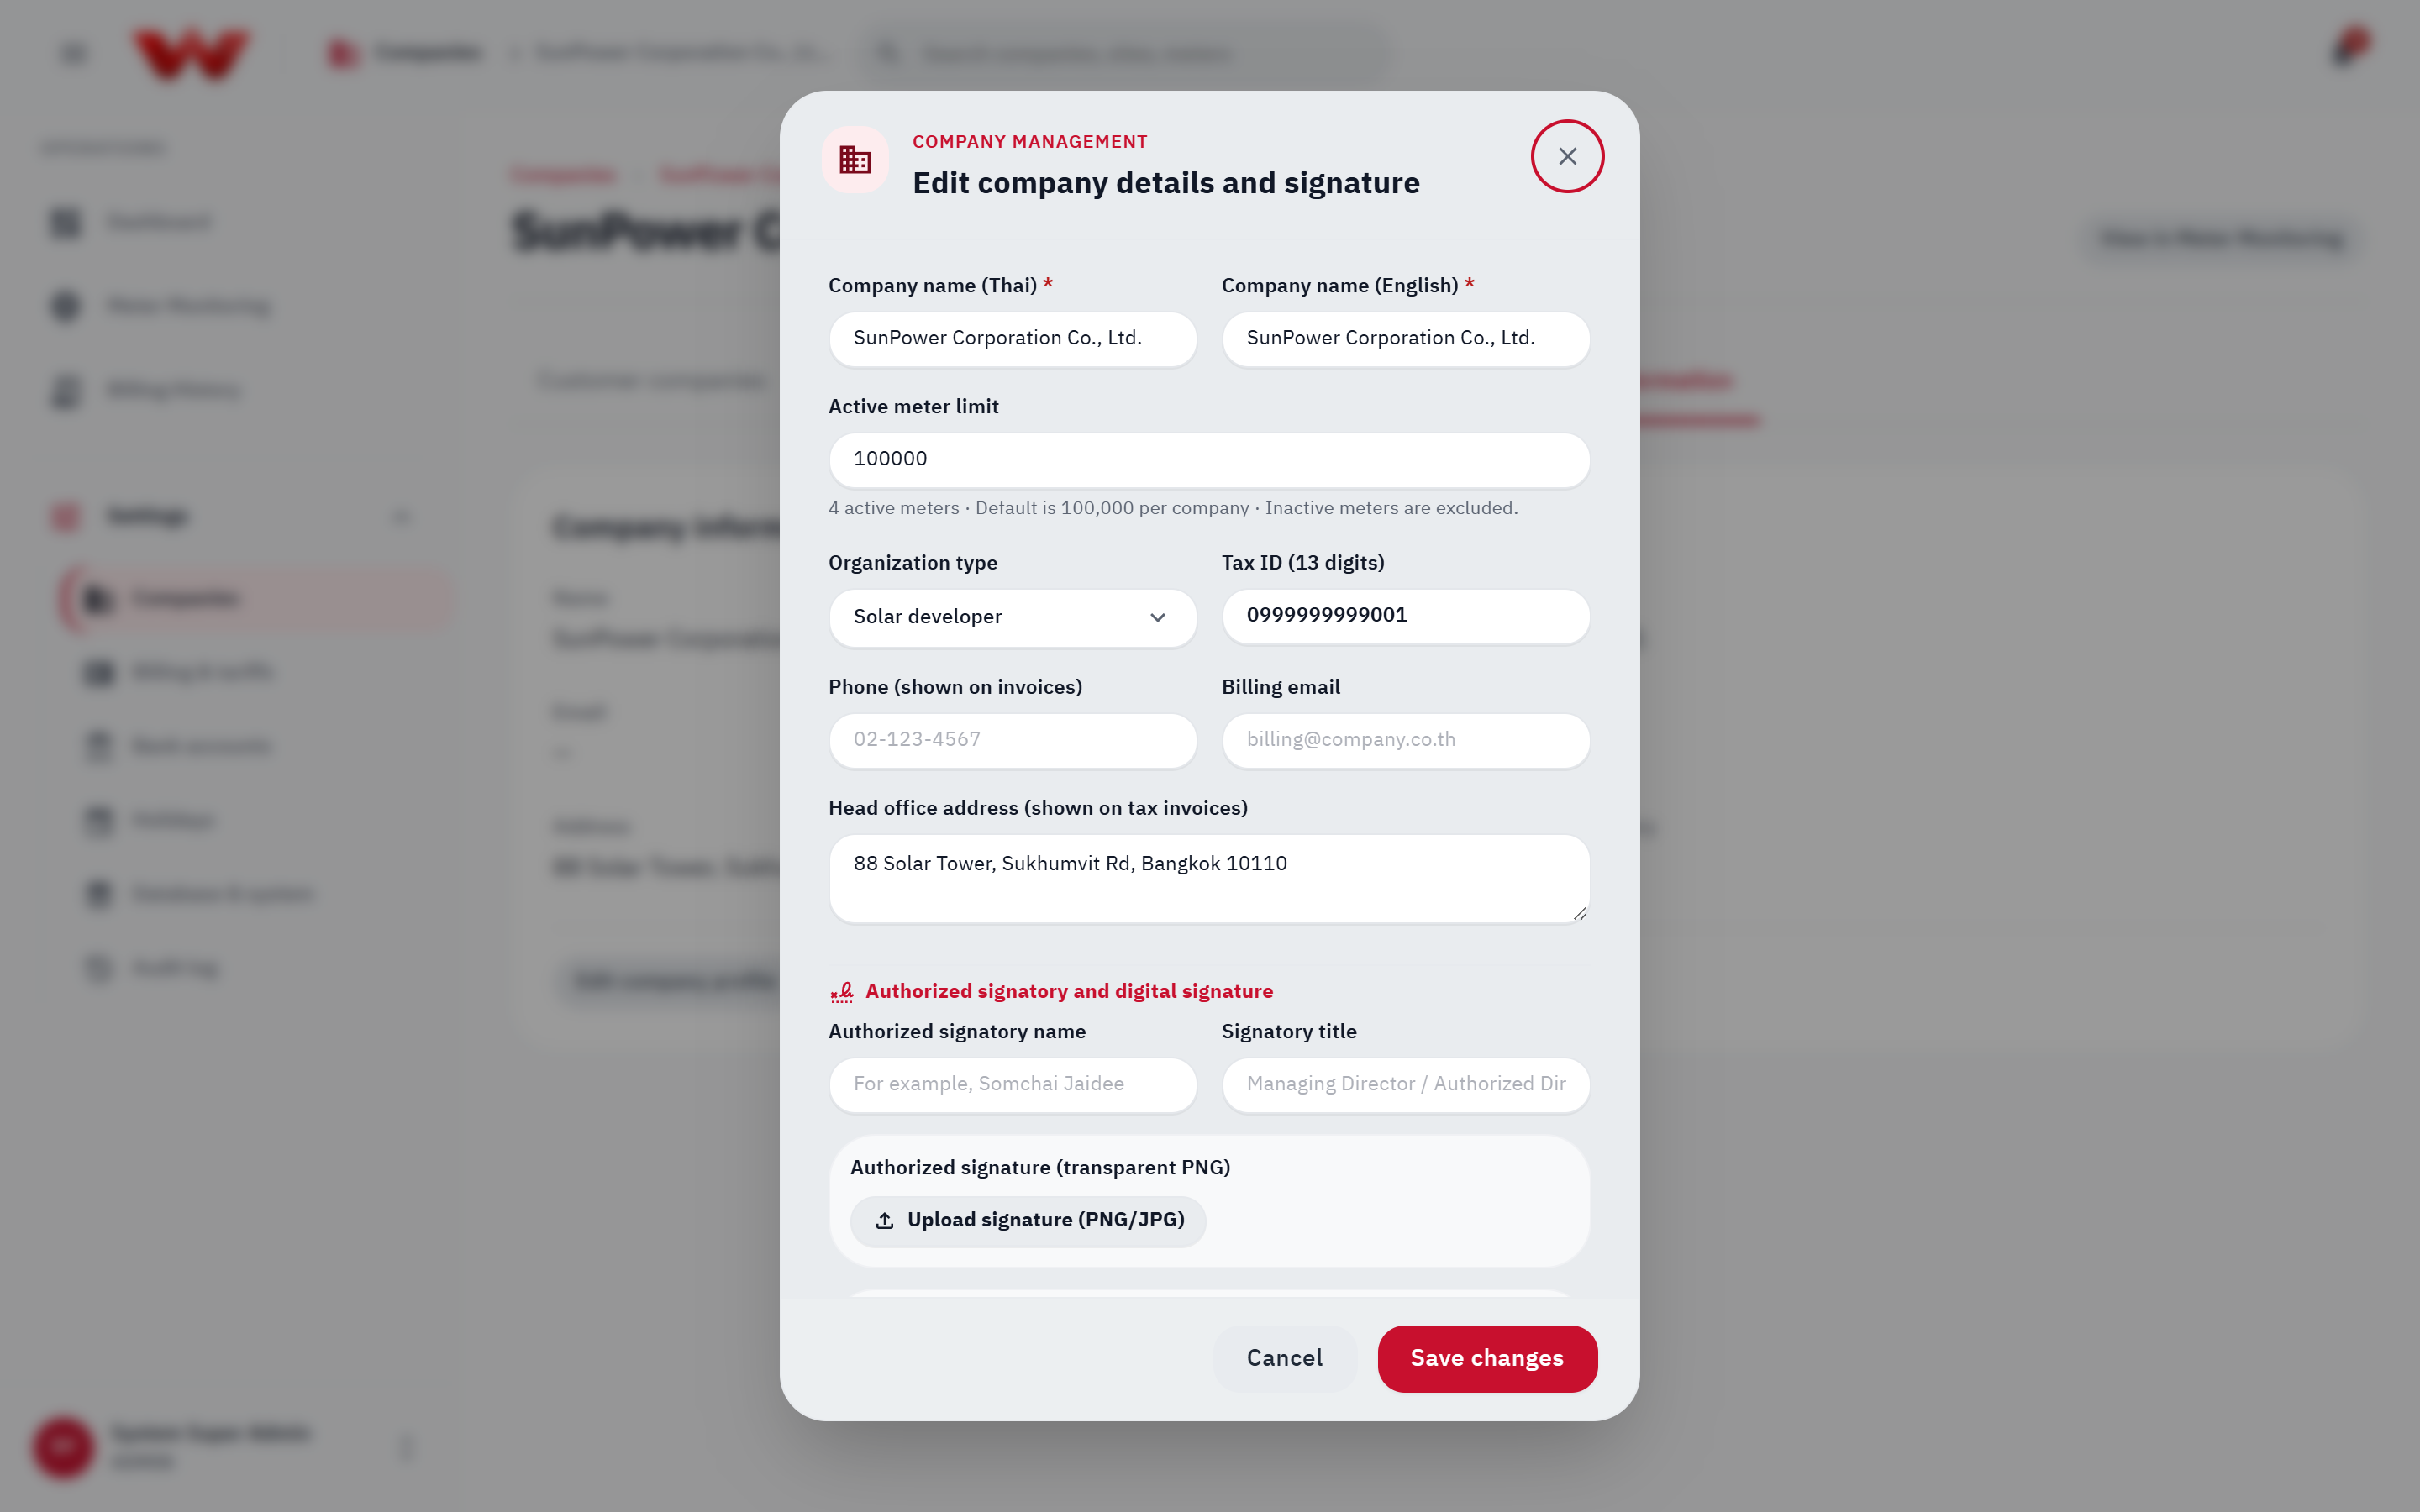 Figure 1: Edit company details dialog showing tax fields, authorized signatory, signature preview, and logo upload.
Platform-Locked Fields
Organization type and Active meter limit are controlled exclusively by the Platform administrator.
2. Onboarding Customer Companies (Off-takers)
- In your developer workspace under Settings, select the Customer companies tab.
- Click Add customer company.
- Complete Step 1. Company:
- Enter Customer company name (required).
- Fill in Tax ID (13 digits), Phone number, and Business / registered address.
- Choose how to proceed:
- Save and add a site: Saves the customer and jumps directly into site & PPA setup (customer portal logins are optional and can be invited later).
- Save and invite customer admin: Proceeds to Step 2. Administrator (optional) to create the customer's first Customer administrator account (enter full name, sign-in email, and either enter or auto-generate an initial password, shown once on Step 3. Continue), then click Continue setup.
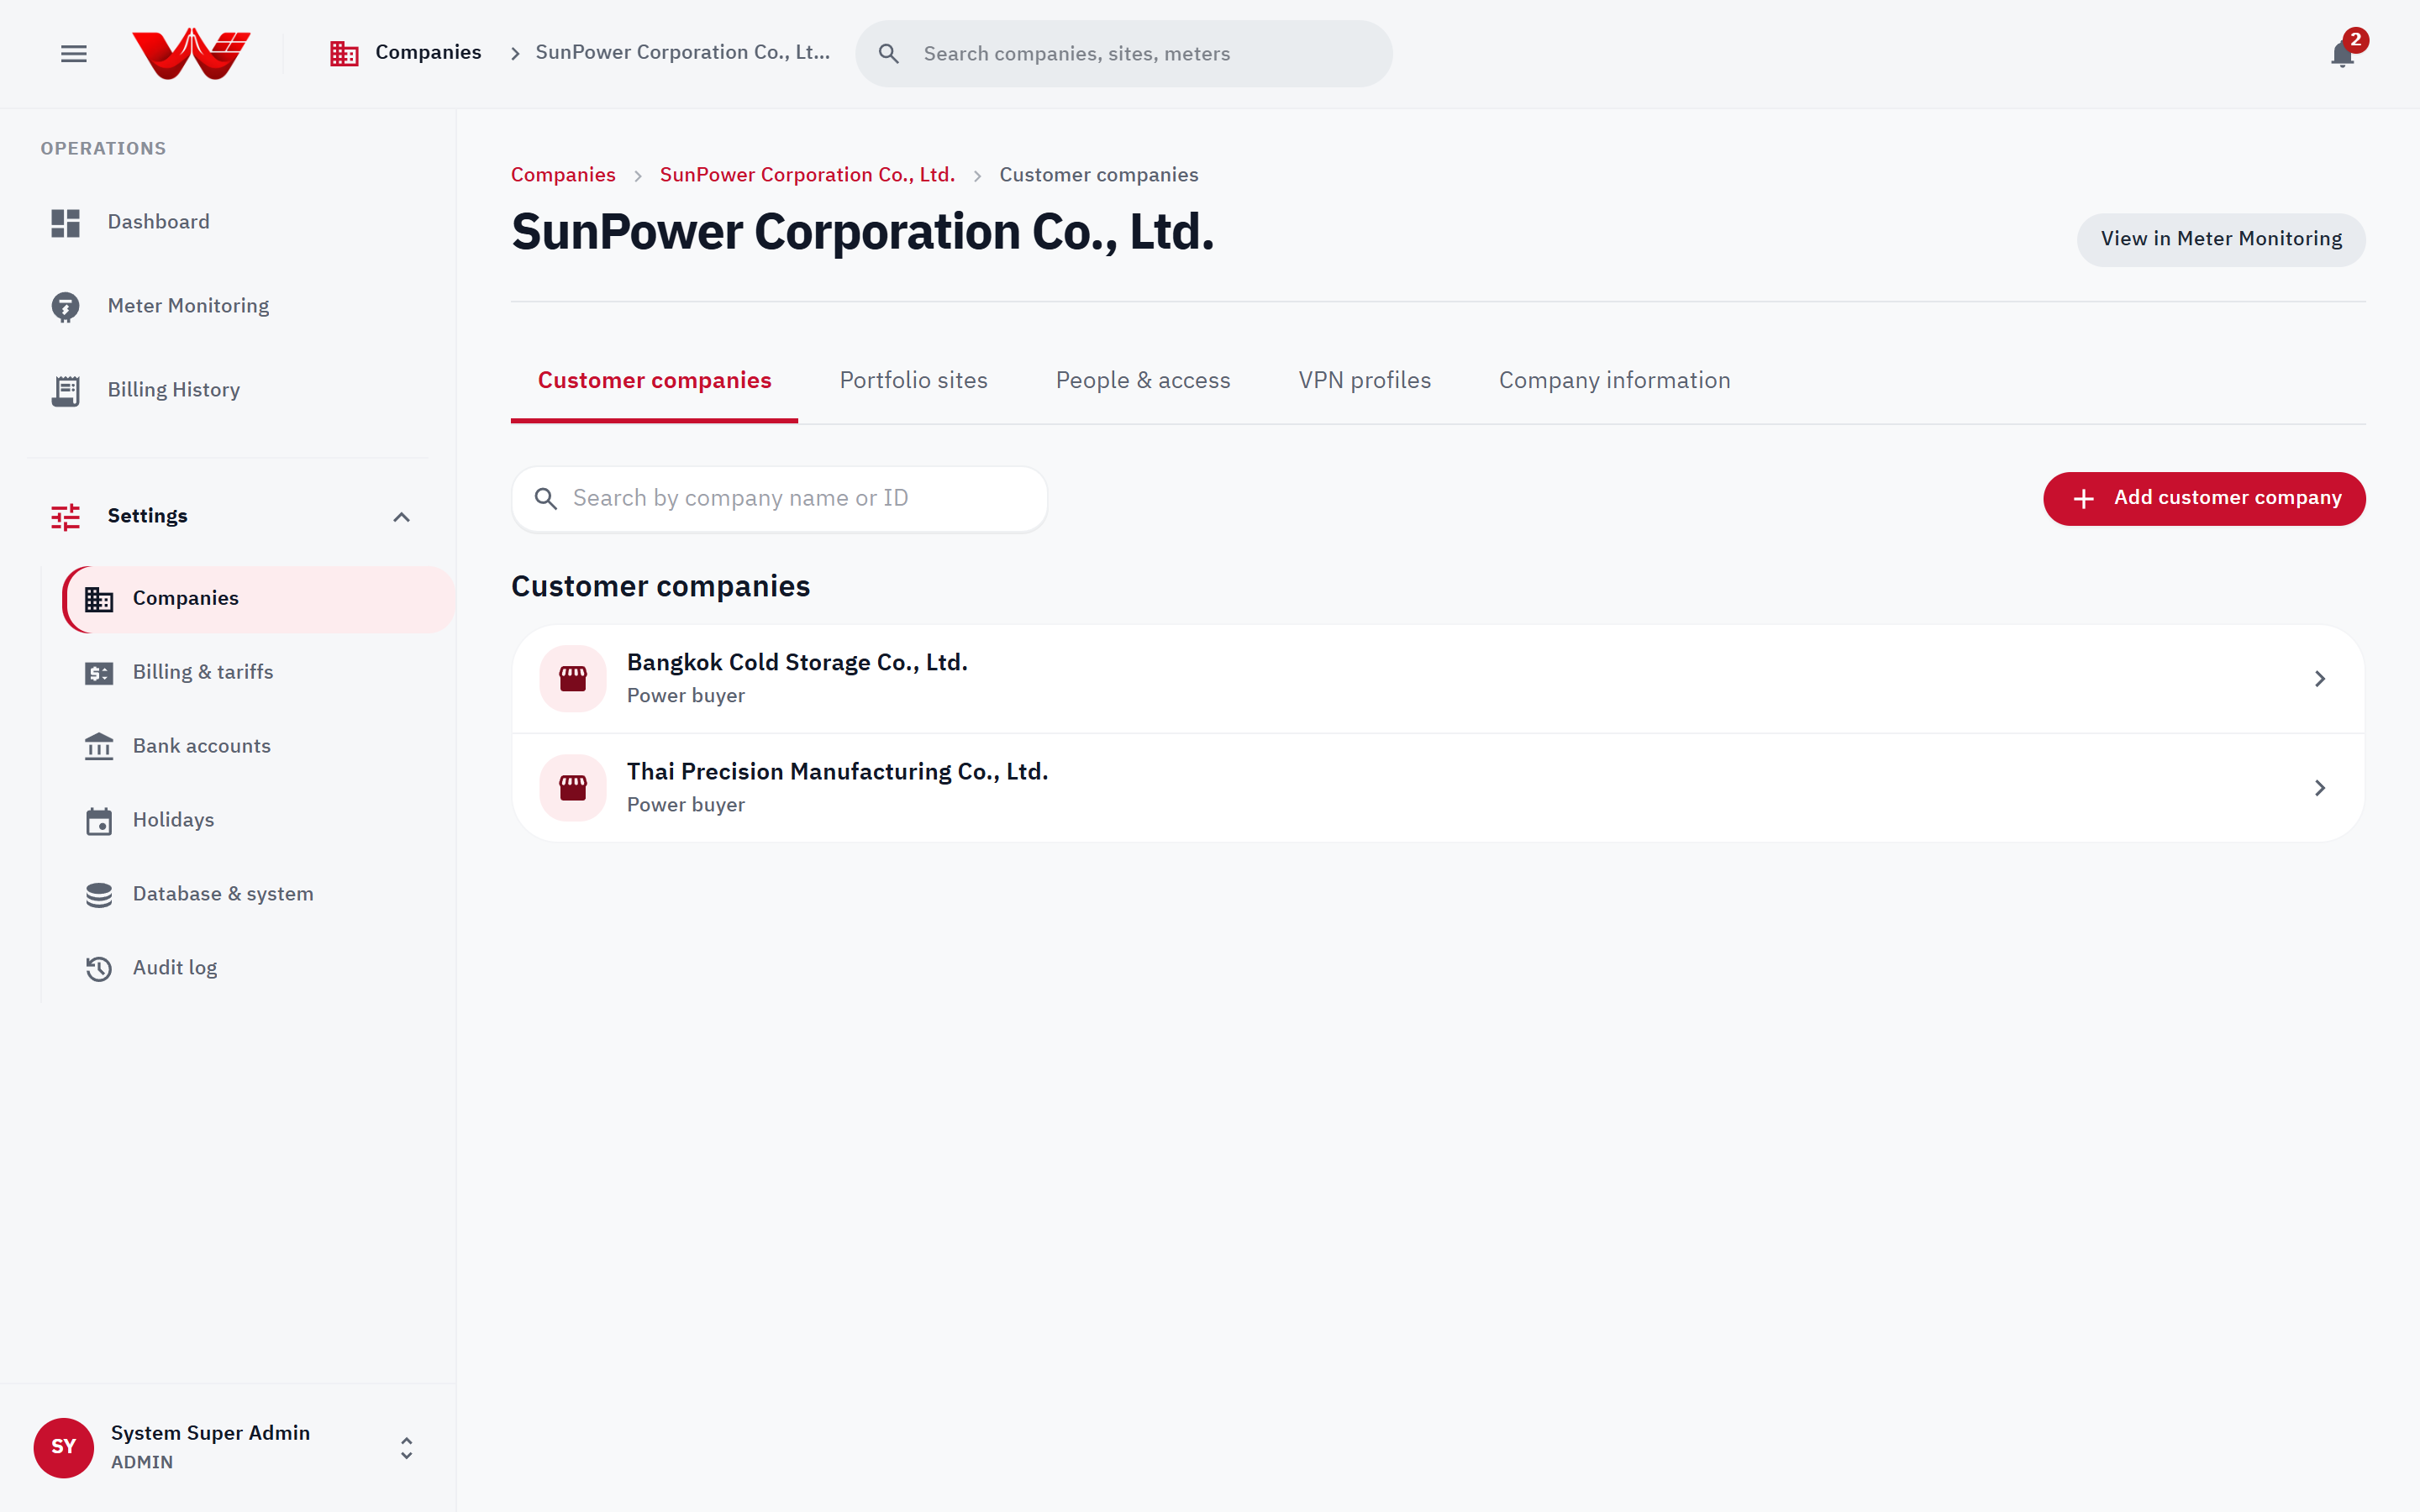 Figure 2: Customer companies directory under a Solar Developer, with the Add customer company workflow.
3. Guided Site, PPA Contract & Meter Setup
From either Portfolio sites or inside a customer company's Sites tab, click Add site to launch the 3-stage setup wizard: 1. Site & PPA → 2. Meter → 3. Check.
Stage 1: Site & PPA Contract (Site & PPA)
- If started from your developer portfolio, choose the Customer / off-taker for this site (or click Add customer company right from the form).
- Enter Site name (required) and Installed capacity (kWp) (used for clear-sky baseline curves on charts).
- Configure PPA billing terms:
- Contract discount (%) (
0–100%) - Billing cut-off day (
1–28, default25) - Payment term after cut-off (days) (
0–120, default30) - Electricity tariff (required) and optional Custom peak / off-peak rates (THB/kWh) to override the schedule rate.
- Contract discount (%) (
- Click Save and add meter.
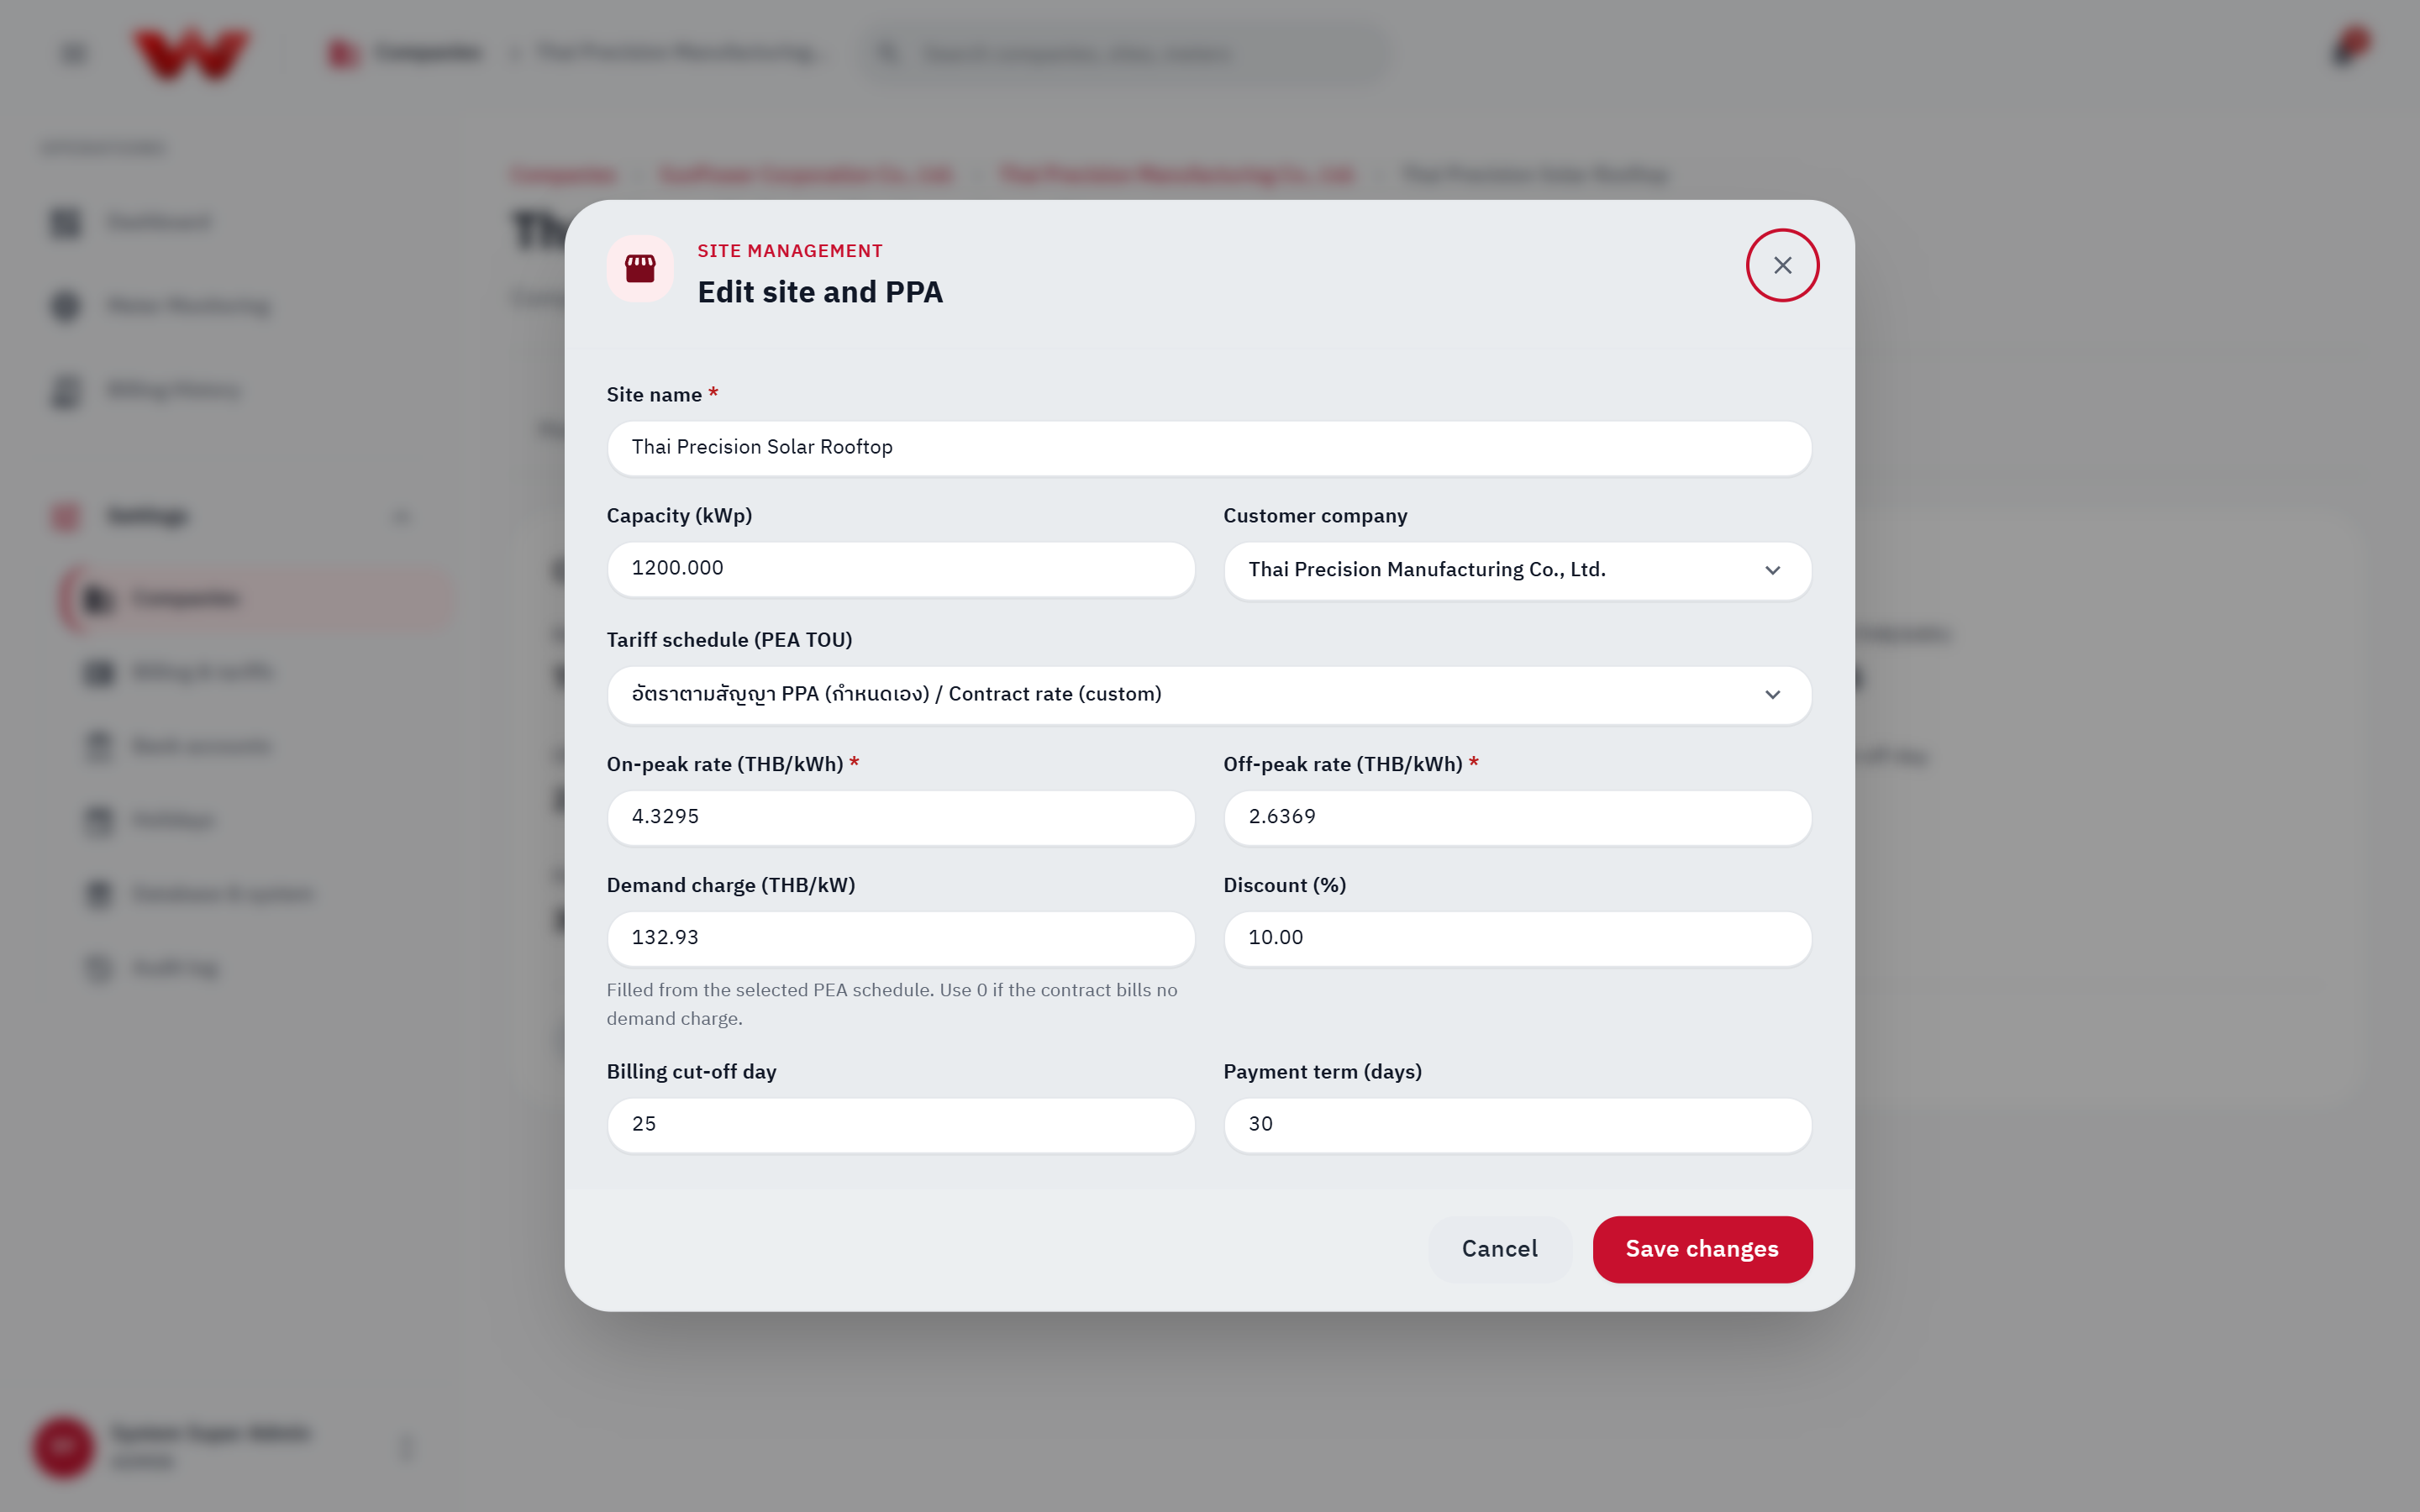 Figure 3: Site and PPA contract configuration including PEA TOU schedule, peak/off-peak rates, demand charge, discount, and cut-off day.
Editing Existing Sites & Prefilling Multi-Site Rollouts
- Edit later: Open the site > PPA tab > Edit site and PPA to adjust capacity, PEA TOU tariff, Demand charge (THB/kW), discount, or payment terms. (Only a Platform Administrator can reassign an existing site to a different customer company, and the billing cut-off day locks once the site has any non-rejected invoice.)
- Multi-site rollout: On Stage 3 (
Check), clicking Add next site for this customer automatically copies the previous site's PPA terms so you don't have to re-type them.
Stage 2: Registering Meters (US-1.19 Automatic Serial Discovery)
- In Stage 2 (Meter), or later from the site's Meters tab, click Add meter.
- Fill in the communication and metering parameters:
- Meter model:
Saral 305,Premier 550, orPrometer 100. - IP address / host and Port (default
4059). - Connection type:
Public fixed IP,Private APN (SIM), orVPN (Mikrotik). - Communication format (Interface):
- HDLC: Meter connects through a 4G modem or serial/IP converter.
- WRAPPER: Ethernet LAN cable plugged directly into the meter (e.g., Prometer 100 over Ethernet).
- Not sure? Start with
HDLCand run Test connection; if the host is reached but the meter times out without answering, switch toWRAPPER.
- Polling interval:
15 minutes,1 hour,6 hours, or24 hours. - Transformer ratios and multiplier (CT/VT): Enter
CT Primary (A),CT Secondary (A),VT Primary (V), andVT Secondary (V). The Multiplier is computed automatically. - Energy reading side:
Primary side: High-voltage side / meter already applies CT/VT multiplier.Secondary side: Low-voltage side / WattDee multiplies raw readings by the Multiplier.
- Meter model:
- During guided setup, keep Start reading right after saving checked so the meter is activated in HES and tested immediately. (Outside guided setup, click Activate in HES, type the meter label/serial to confirm, and run Test connection.)
- Click Save meter.
- Click Next: check setup to open Stage 3 (
Check), showing PPA status,Meters reporting / registered, and a reminder if the customer company has no portal users yet.
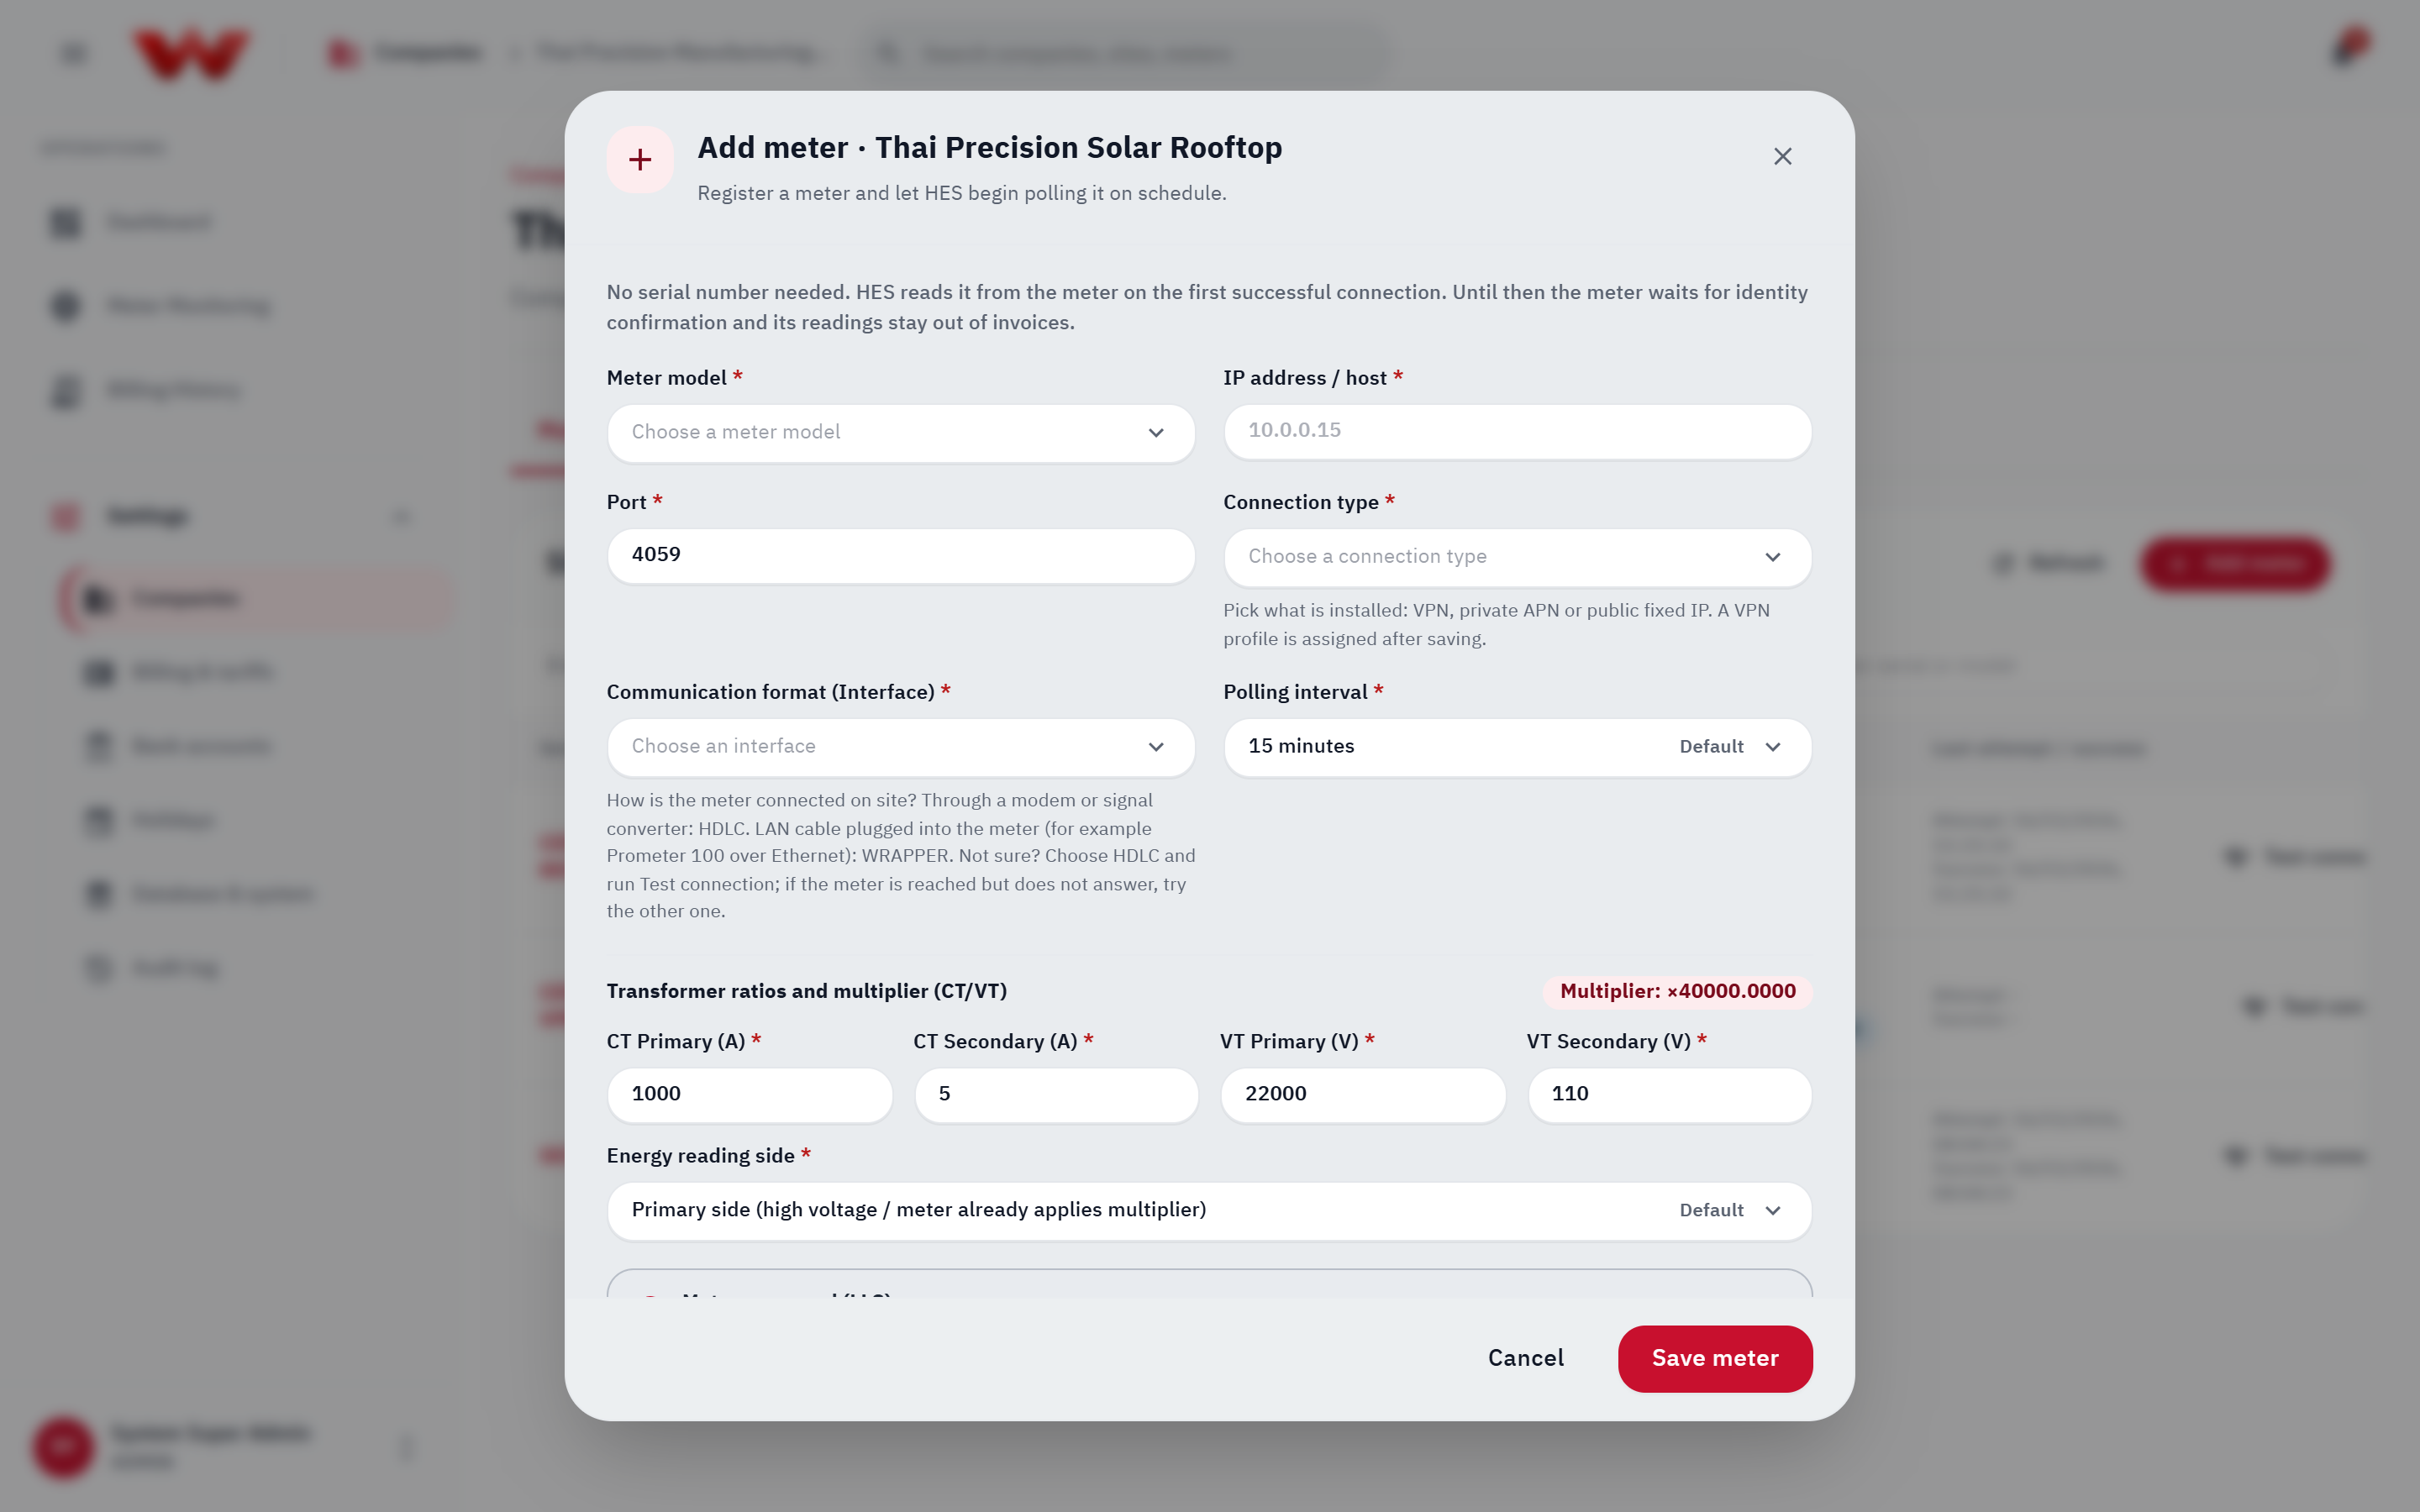 Figure 4: Site meters list and registration form showing connection settings, CT/VT ratios, and activation state.
Important Rules for Serial Numbers & LLS Passwords (US-1.19)
- No manual serial entry: HES reads the serial number directly from the meter on its first successful connection. While waiting, the meter shows
Waiting for HES to read the serial. Not billed yetand its intervals are kept out of invoices. - No LLS password entry in the portal: Configure the meter's LLS password on the HES host (model secret or per-meter secrets file). If omitted, Test connection reports
config_error. - Serial conflicts or suspected swaps: If HES detects a duplicate serial or a mismatch against a registered meter, readings are held from billing (
Identity check failed/Duplicate/Suspected meter swap). Contact your Platform administrator to verify the physical nameplate and run Correct serial or Confirm swap with an audit reason (minimum 5 characters).
4. VPN Profiles & Meter Connectivity
WattDee supports WireGuard, IPsec, and OpenVPN profiles shared across a developer's sites.
Platform Permission Required for VPN Changes (vpn.manage)
Creating, editing, enabling/disabling VPN profiles and assigning meters under a site's Connectivity tab require the Platform administrator (vpn.manage) role. Developer admins coordinate profile details and assignments with the platform administrator.
Configuring a VPN Profile (Platform Admin in Developer Workspace)
- Open the developer company in Settings > VPN profiles.
- Click Add VPN profile (or select a profile and click Edit settings).
- (Optional) For WireGuard or OpenVPN, expand Import configuration, paste the configuration text, and click Review imported settings.
- Enter Connection details:
- Connection name and Protocol (
WireGuard,IPsec,OpenVPN). - For WireGuard (Connection mode):
- We dial the site (
dial): Use when the site gateway has a static public IPv4. Enter Peer IPv4 address and Peer port (default51820). - The site dials us (
listen): Use when the site connects over 4G / CGNAT without a public IP. Enter Server UDP port (1024–65535, default51821) and ensure that UDP port is open in the server firewall (no peer IP is required).
- We dial the site (
- Allowed meter networks (CIDR): e.g.,
10.10.0.0/24(every meter assigned to this VPN profile must use an IP inside these CIDR blocks). - Complete protocol-specific settings (WireGuard local tunnel CIDR, peer public key, keepalive; IPsec IKEv1/IKEv2, PSK or PEM certificates; OpenVPN transport UDP/TCP, server certificate name, PEM certificates, optional TLS Crypt).
- Check Replace credentials when rotating keys on an existing profile.
- Connection name and Protocol (
- Click Save VPN connection and wait for the status tag to show Tunnel established (or Runner ready).
Assigning a VPN Profile to a Site Meter
- Open the target site > Connectivity tab.
- Select the VPN profile, choose the meter from HES meter, and click Assign meter.
- To detach a meter, click Unassign (note: unassigning stops HES polling for that meter).
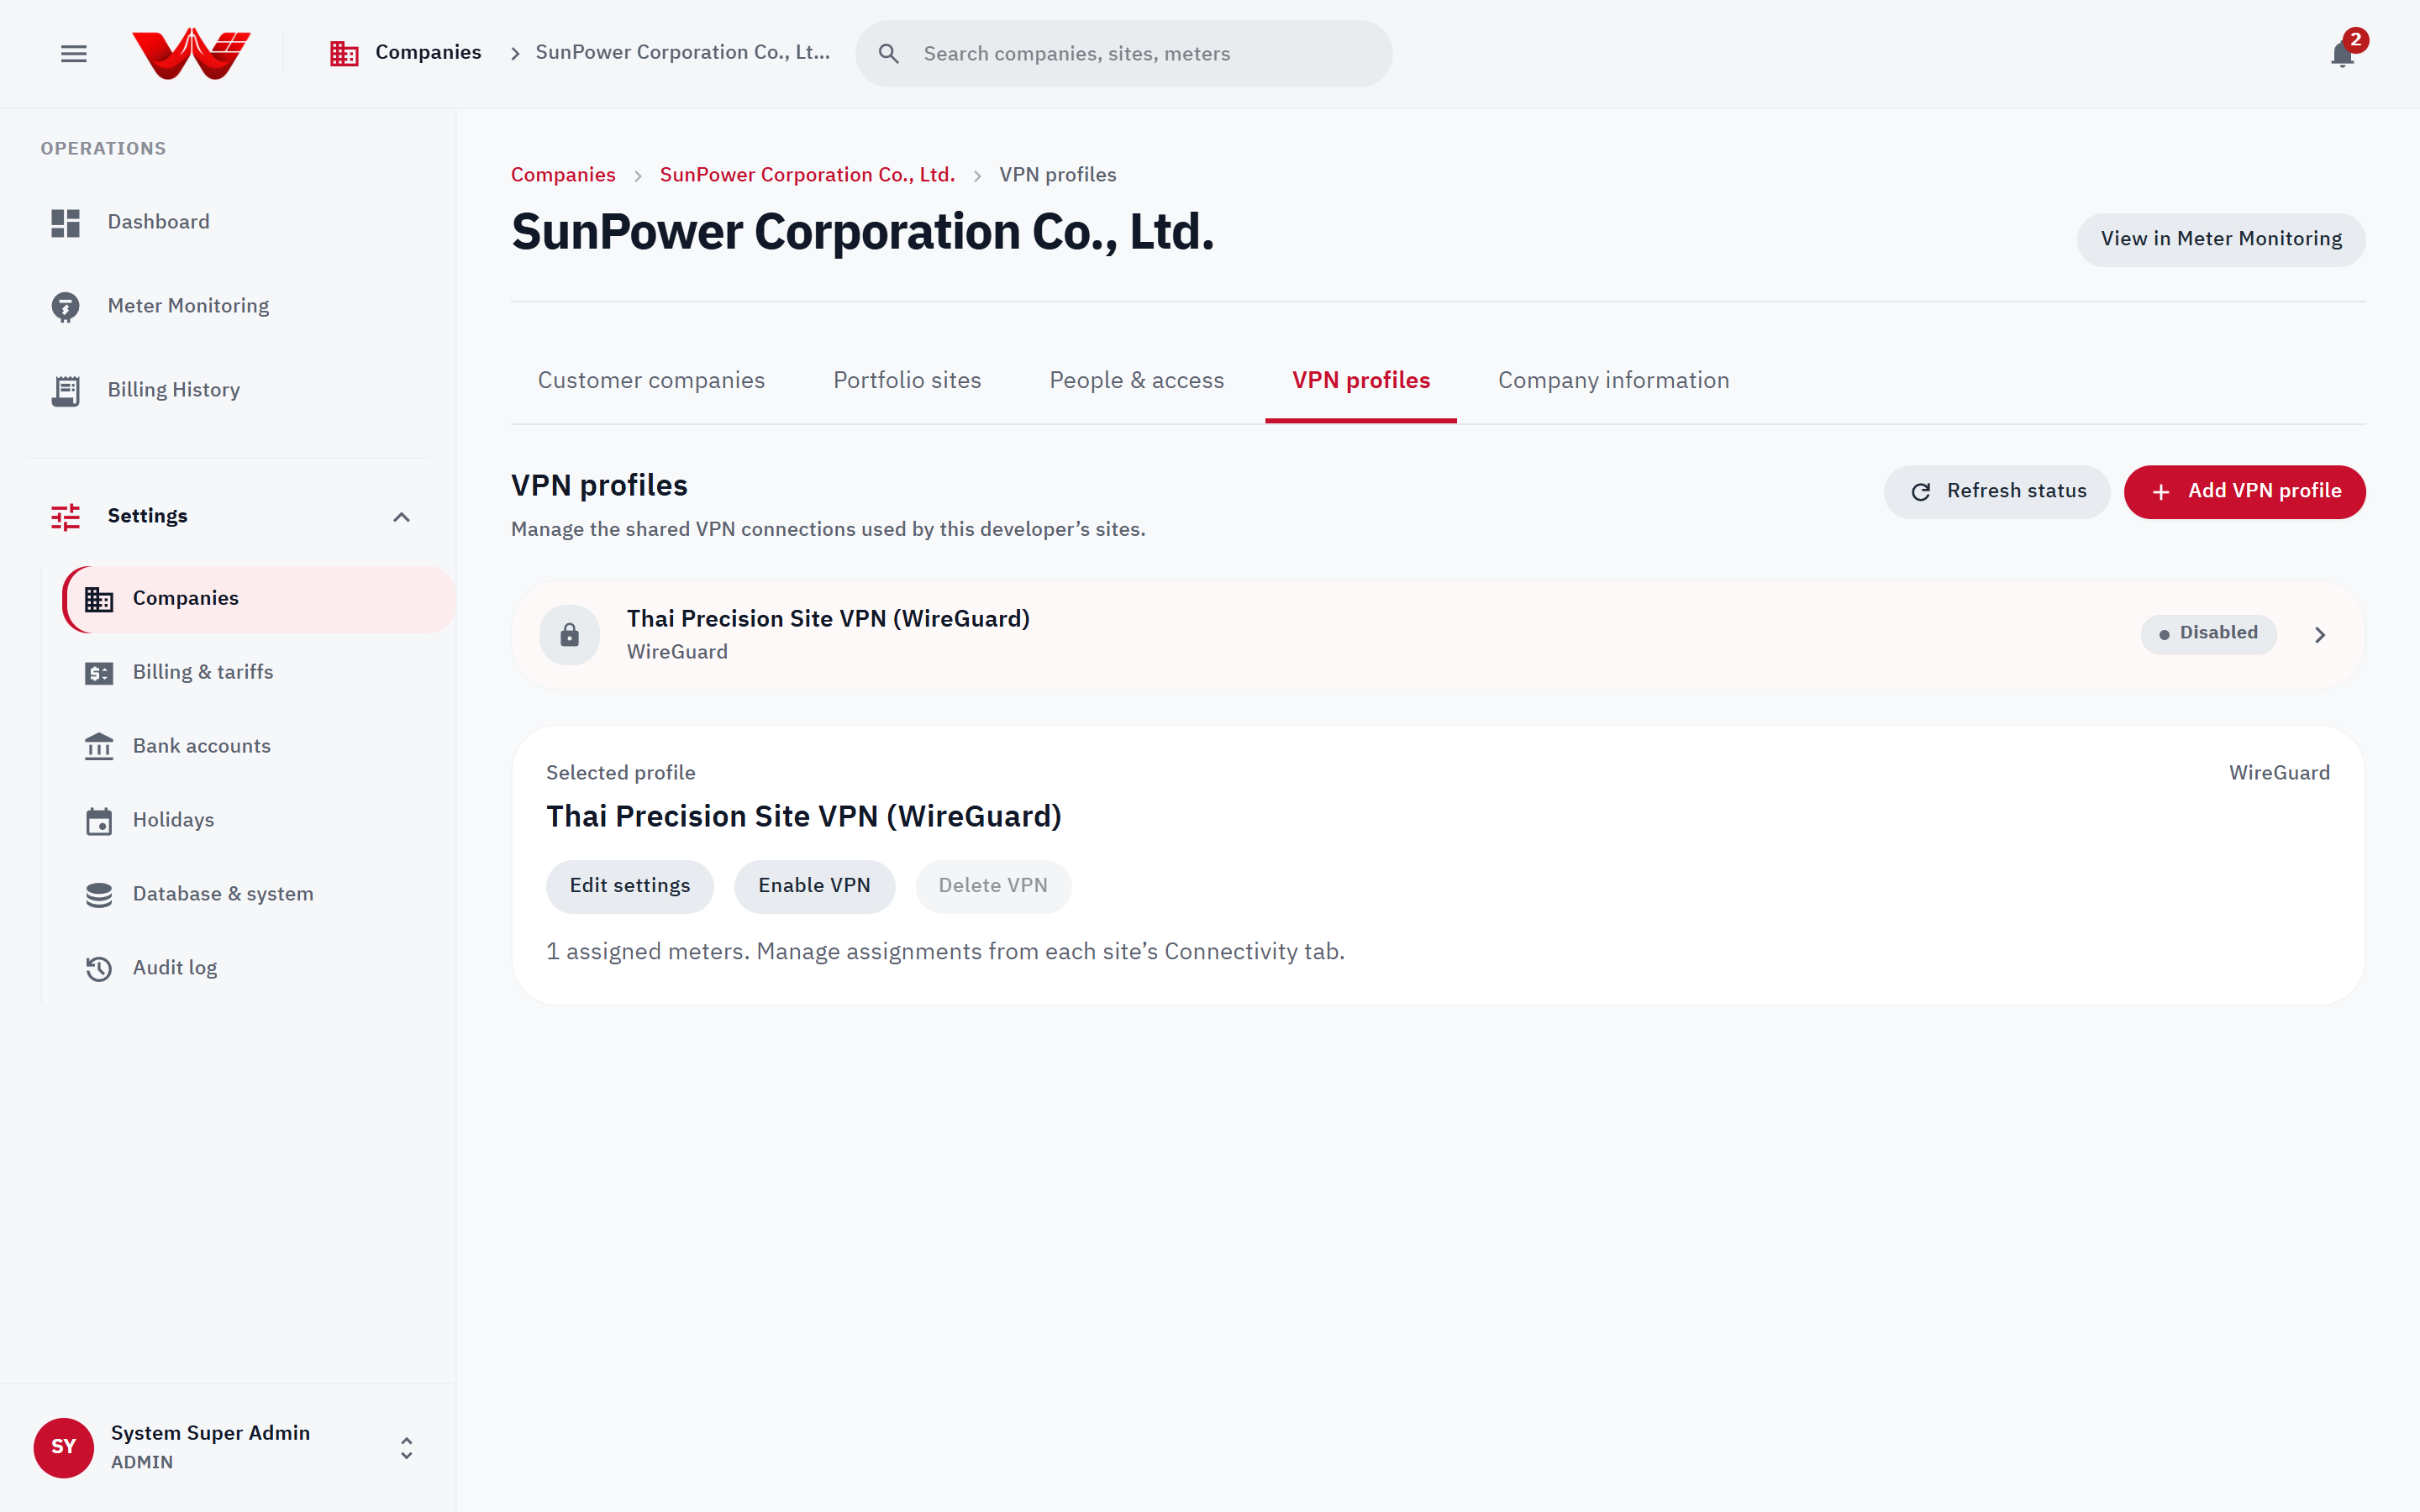 Figure 5: VPN profiles management screen showing active tunnel statuses and protocol configuration.
5. Managing Team Members & Customer Users (People & access)
Developer Administrators manage users inside both their own developer company and their customer companies.
- Open People & access on the target developer or customer company.
- Click Add user.
- Verify Organization and enter Full name and Email.
- Select the Role (available options match the company tier):
- Solar Developer:
Company administrator,O&M engineer,Accounting,System operator - Customer Company:
Customer administrator,Customer representative,Read only - The Access box previews all sites the user will reach before you save.
- Solar Developer:
- Set a Password: type a password meeting all 5 complexity rules, click Generate secure password, or leave blank to auto-generate a one-time temporary password (displayed once after creation).
- Click Add user.
Ongoing Account Management
- View site access: Inspect the paginated list of sites reachable by that user.
- Edit / Reset password: Click the edit icon > optionally enter a password or leave blank to auto-generate > click Reset password (immediately signs the user out on every device; one-time temporary password is shown once).
- Suspend account: Immediately revokes access while preserving history and audit trails; accounts can be reactivated anytime.
- Delete account permanently: Located inside the Edit user dialog for permanent removal.
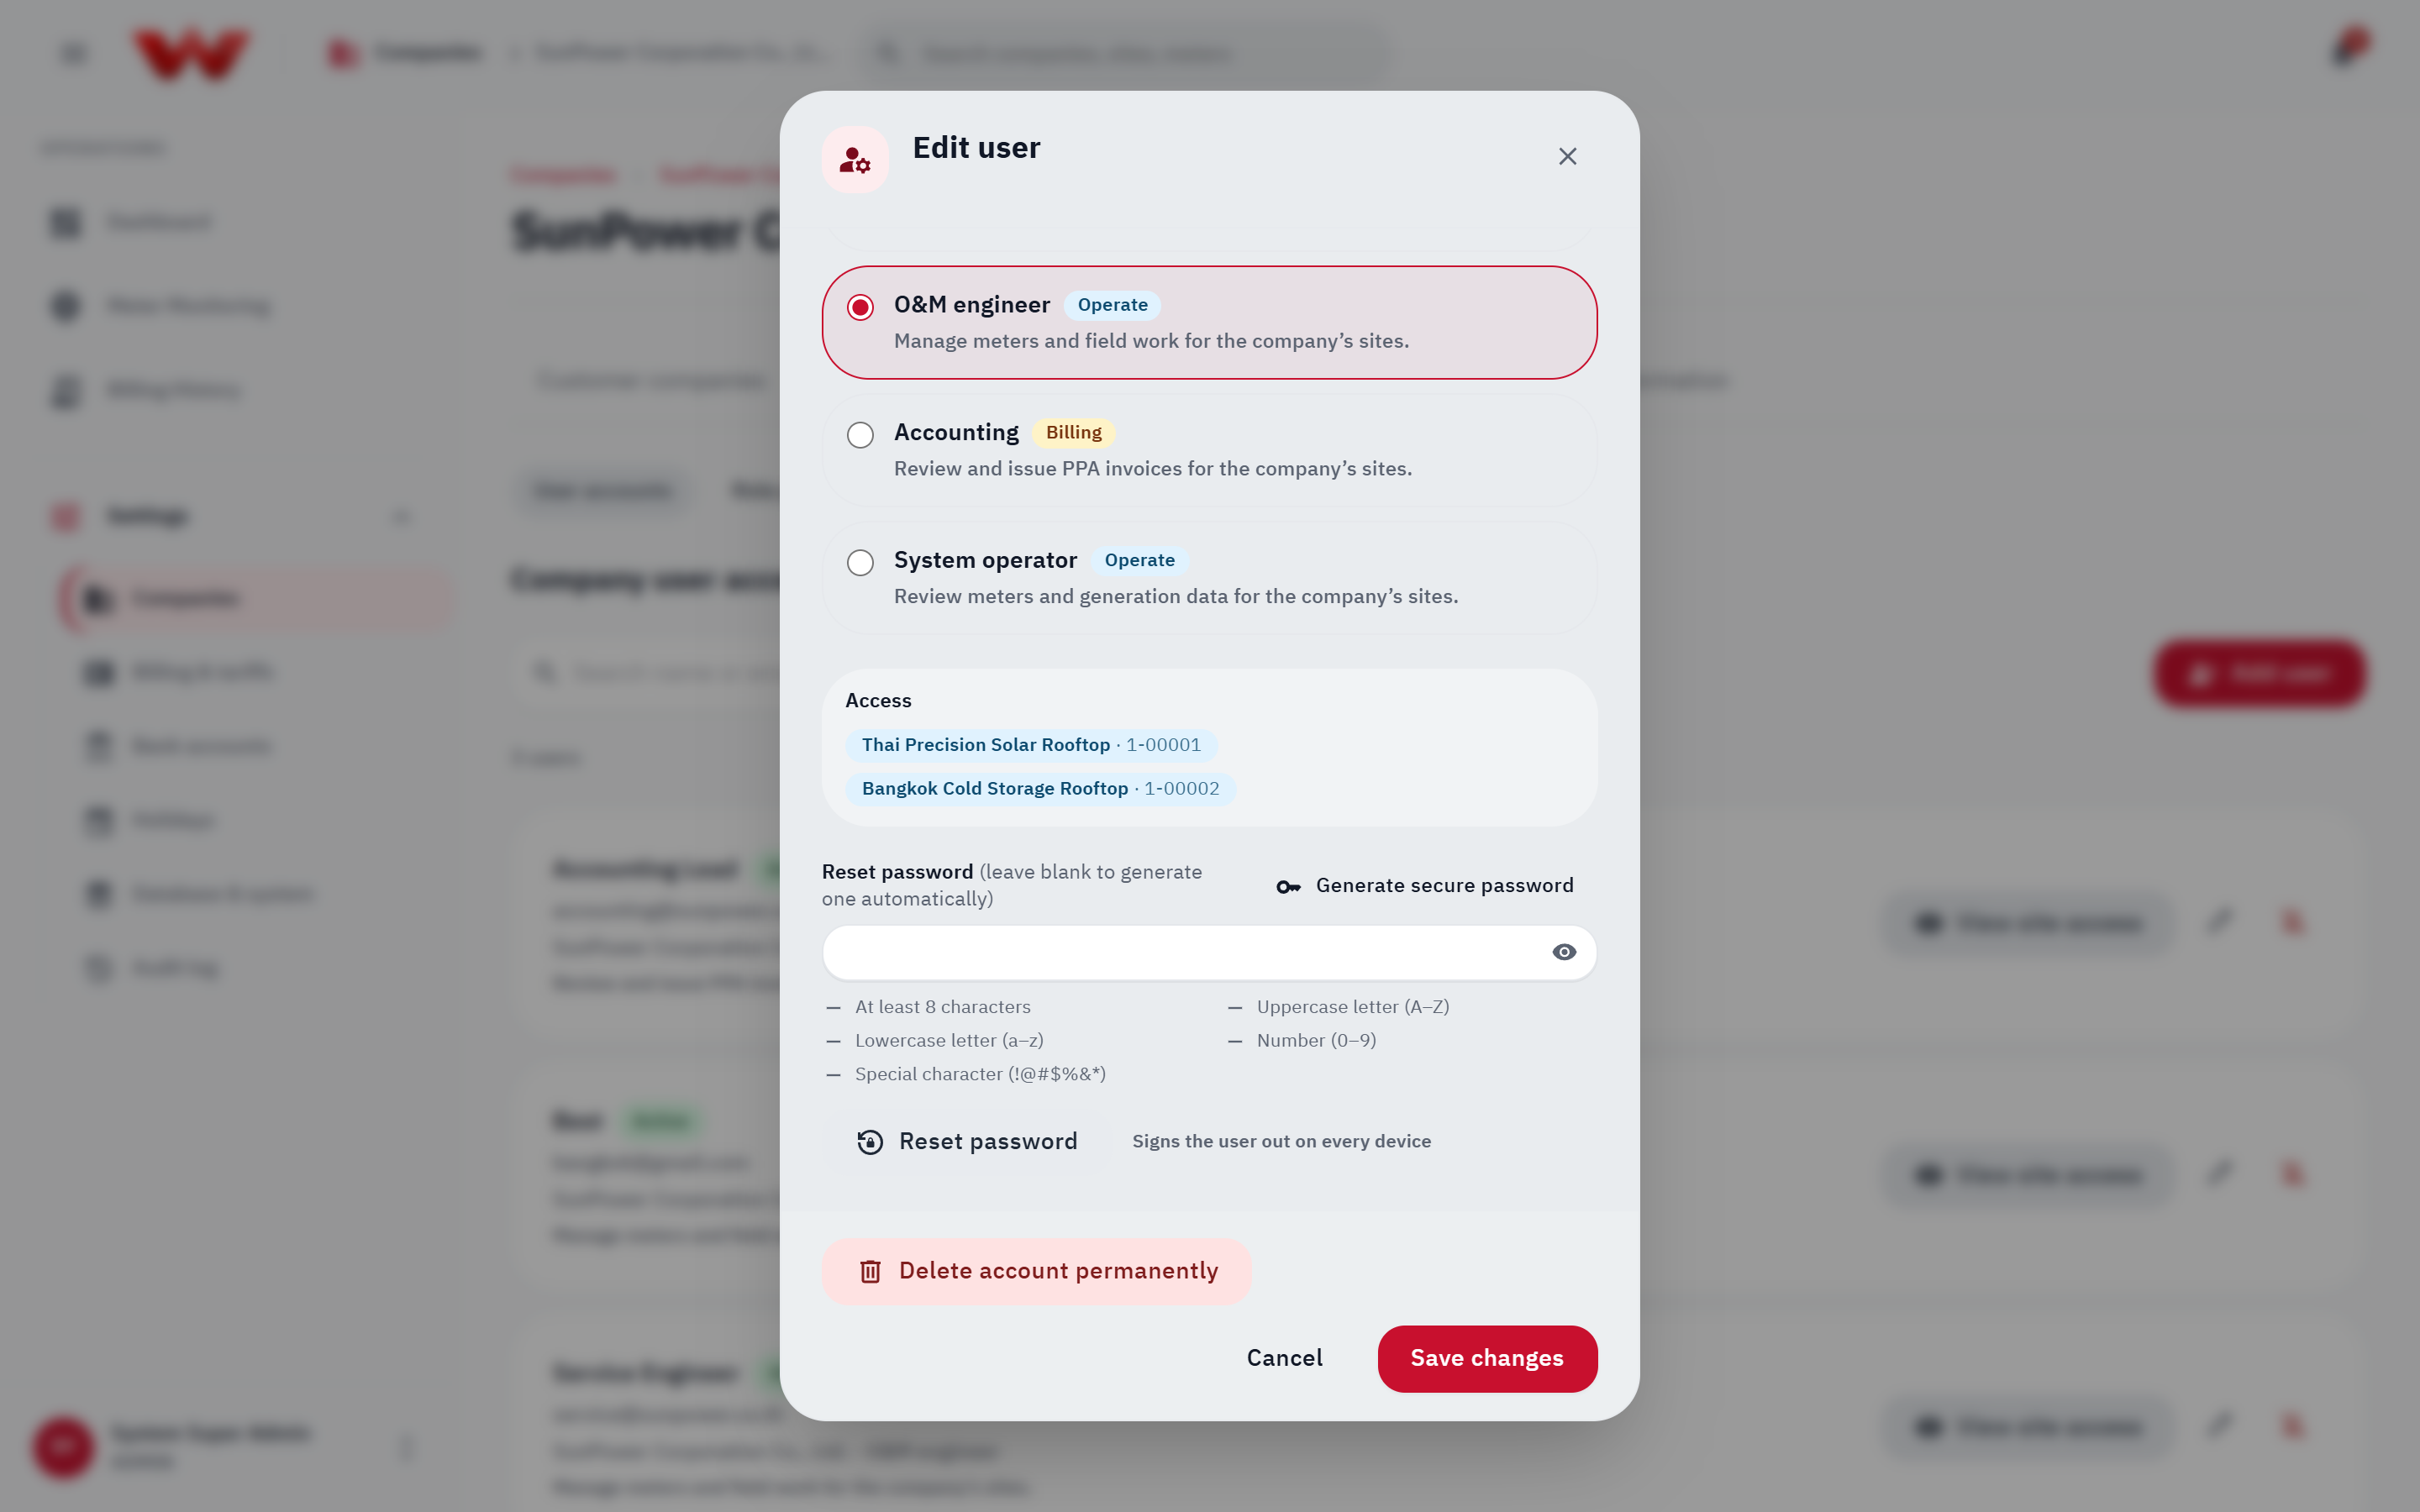 Figure 6: People & access view listing company users, active/suspended status, roles, and site-access inspection.
Built-In Governance Safeguards
- You cannot change your own role or suspend your own account, preventing self-escalation or accidental lockout.
- The last active Administrator of any organization cannot be demoted, suspended, or deleted.
- Only a Platform administrator can move an existing user from one organization to another.