---
title: Developer Admin Guide
---
::: warning UAT release
This guide describes the upcoming portal update. Some screens or actions may differ in the current UAT portal.
:::
# Solar Developer Admin Guide
**Who is this for:** Company Administrator (Developer ADMIN) Platform Administrator (assisting with VPN & serial confirmation)
**Prerequisites:**
- Signed in with a **Company administrator** account in a **Solar developer** organization (created by your Platform Administrator).
- Legal entity details for invoicing (13-digit Tax ID, registered address, company logo, and transparent PNG authorized signature).
- Off-taker customer details, PPA contract terms (tariff, discount, cut-off day, payment term), and meter network/CT/VT specifications.
---
## 1. Company Profile, Logo & Digital Signature
Clicking **Settings** in the sidebar opens your Solar Developer workspace directly.
1. Open the **Company information** tab.
2. Click **Edit company profile**.
3. Update the legal and billing fields shown on invoices and tax documents:
- **Company name (Thai)** and **Company name (English)**
- **Tax ID (13 digits)**
- **Phone (shown on invoices)** and **Billing email**
- **Head office address (shown on tax invoices)**
4. Under **Authorized signatory and digital signature**:
- Enter **Authorized signatory name** and **Signatory title**.
- Click **Upload signature (PNG/JPG)** *(use a transparent PNG for crisp rendering on invoice PDFs)*.
- Click **Upload logo** to attach your company logo (PNG, JPG, or WebP).
5. Click **Save changes**.
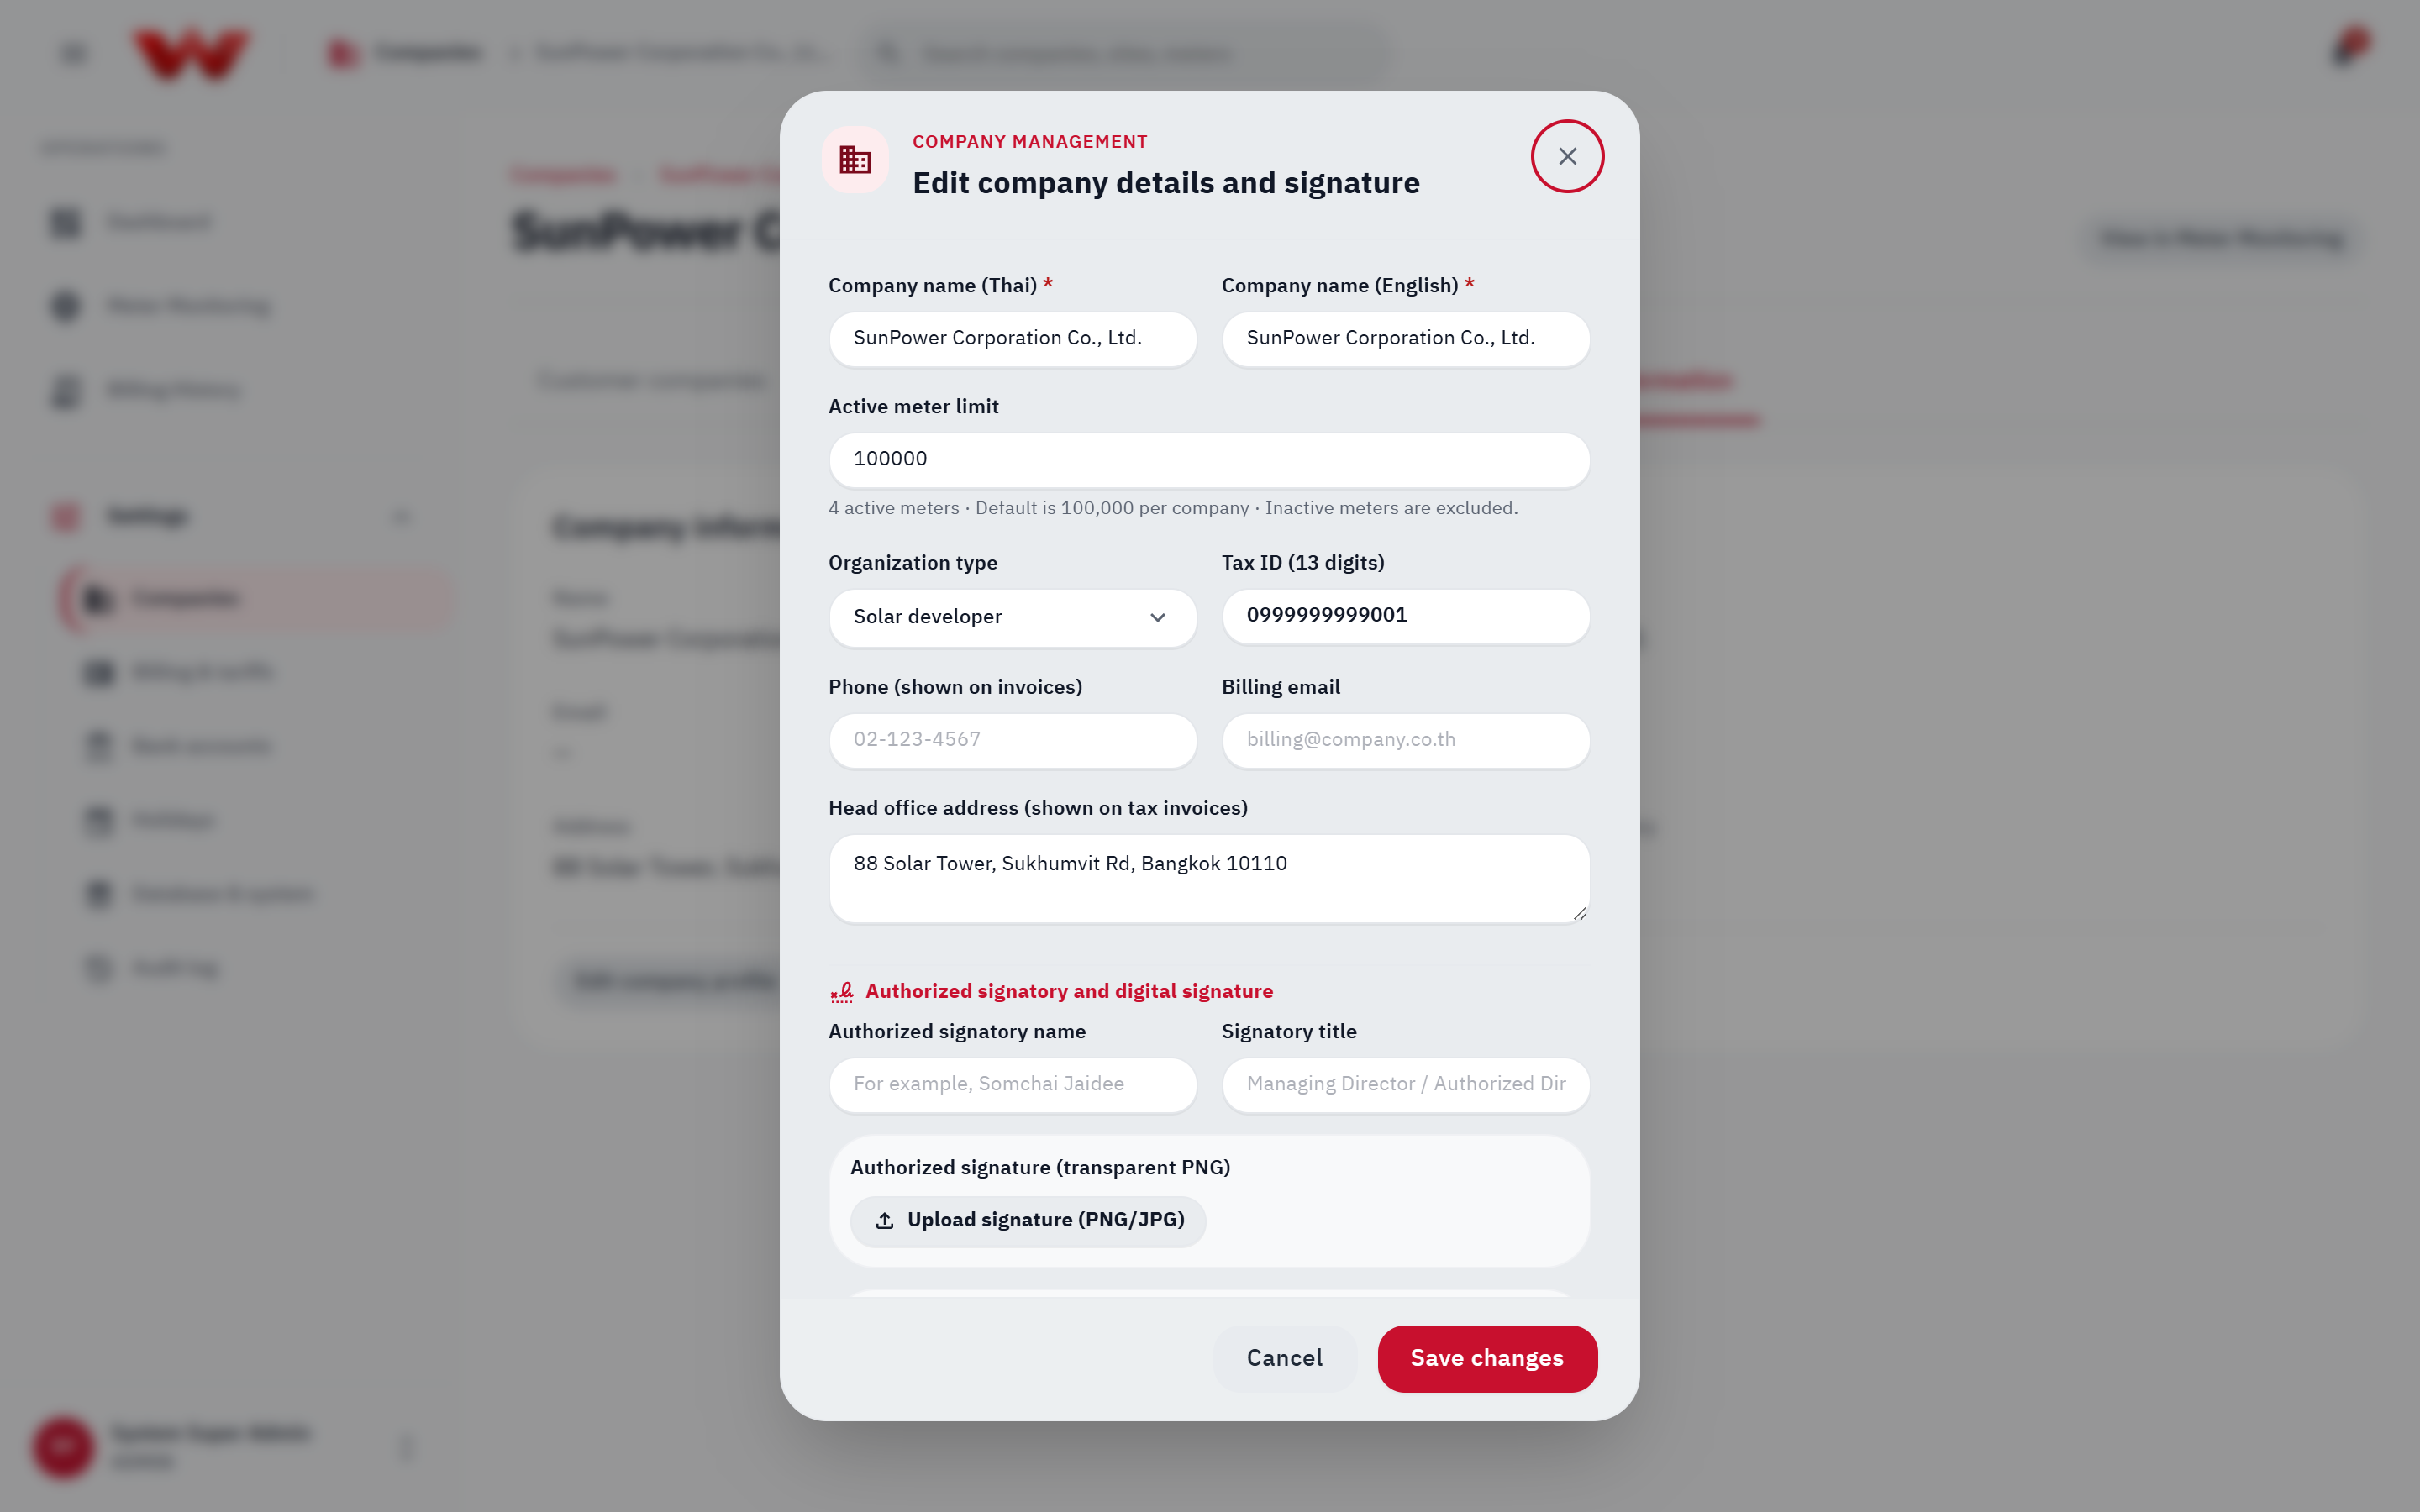
*Figure 1: Edit company details dialog showing tax fields, authorized signatory, signature preview, and logo upload.*
::: info Platform-Locked Fields
**Organization type** and **Active meter limit** are controlled exclusively by the **Platform administrator**.
:::
---
## 2. Onboarding Customer Companies (Off-takers)
1. In your developer workspace under **Settings**, select the **Customer companies** tab.
2. Click **Add customer company**.
3. Complete **Step 1. Company**:
- Enter **Customer company name** *(required)*.
- Fill in **Tax ID (13 digits)**, **Phone number**, and **Business / registered address**.
4. Choose how to proceed:
- **Save and add a site:** Saves the customer and jumps directly into site & PPA setup *(customer portal logins are optional and can be invited later)*.
- **Save and invite customer admin:** Proceeds to **Step 2. Administrator (optional)** to create the customer's first **Customer administrator** account (enter full name, sign-in email, and either enter or auto-generate an initial password, shown once on **Step 3. Continue**), then click **Continue setup**.
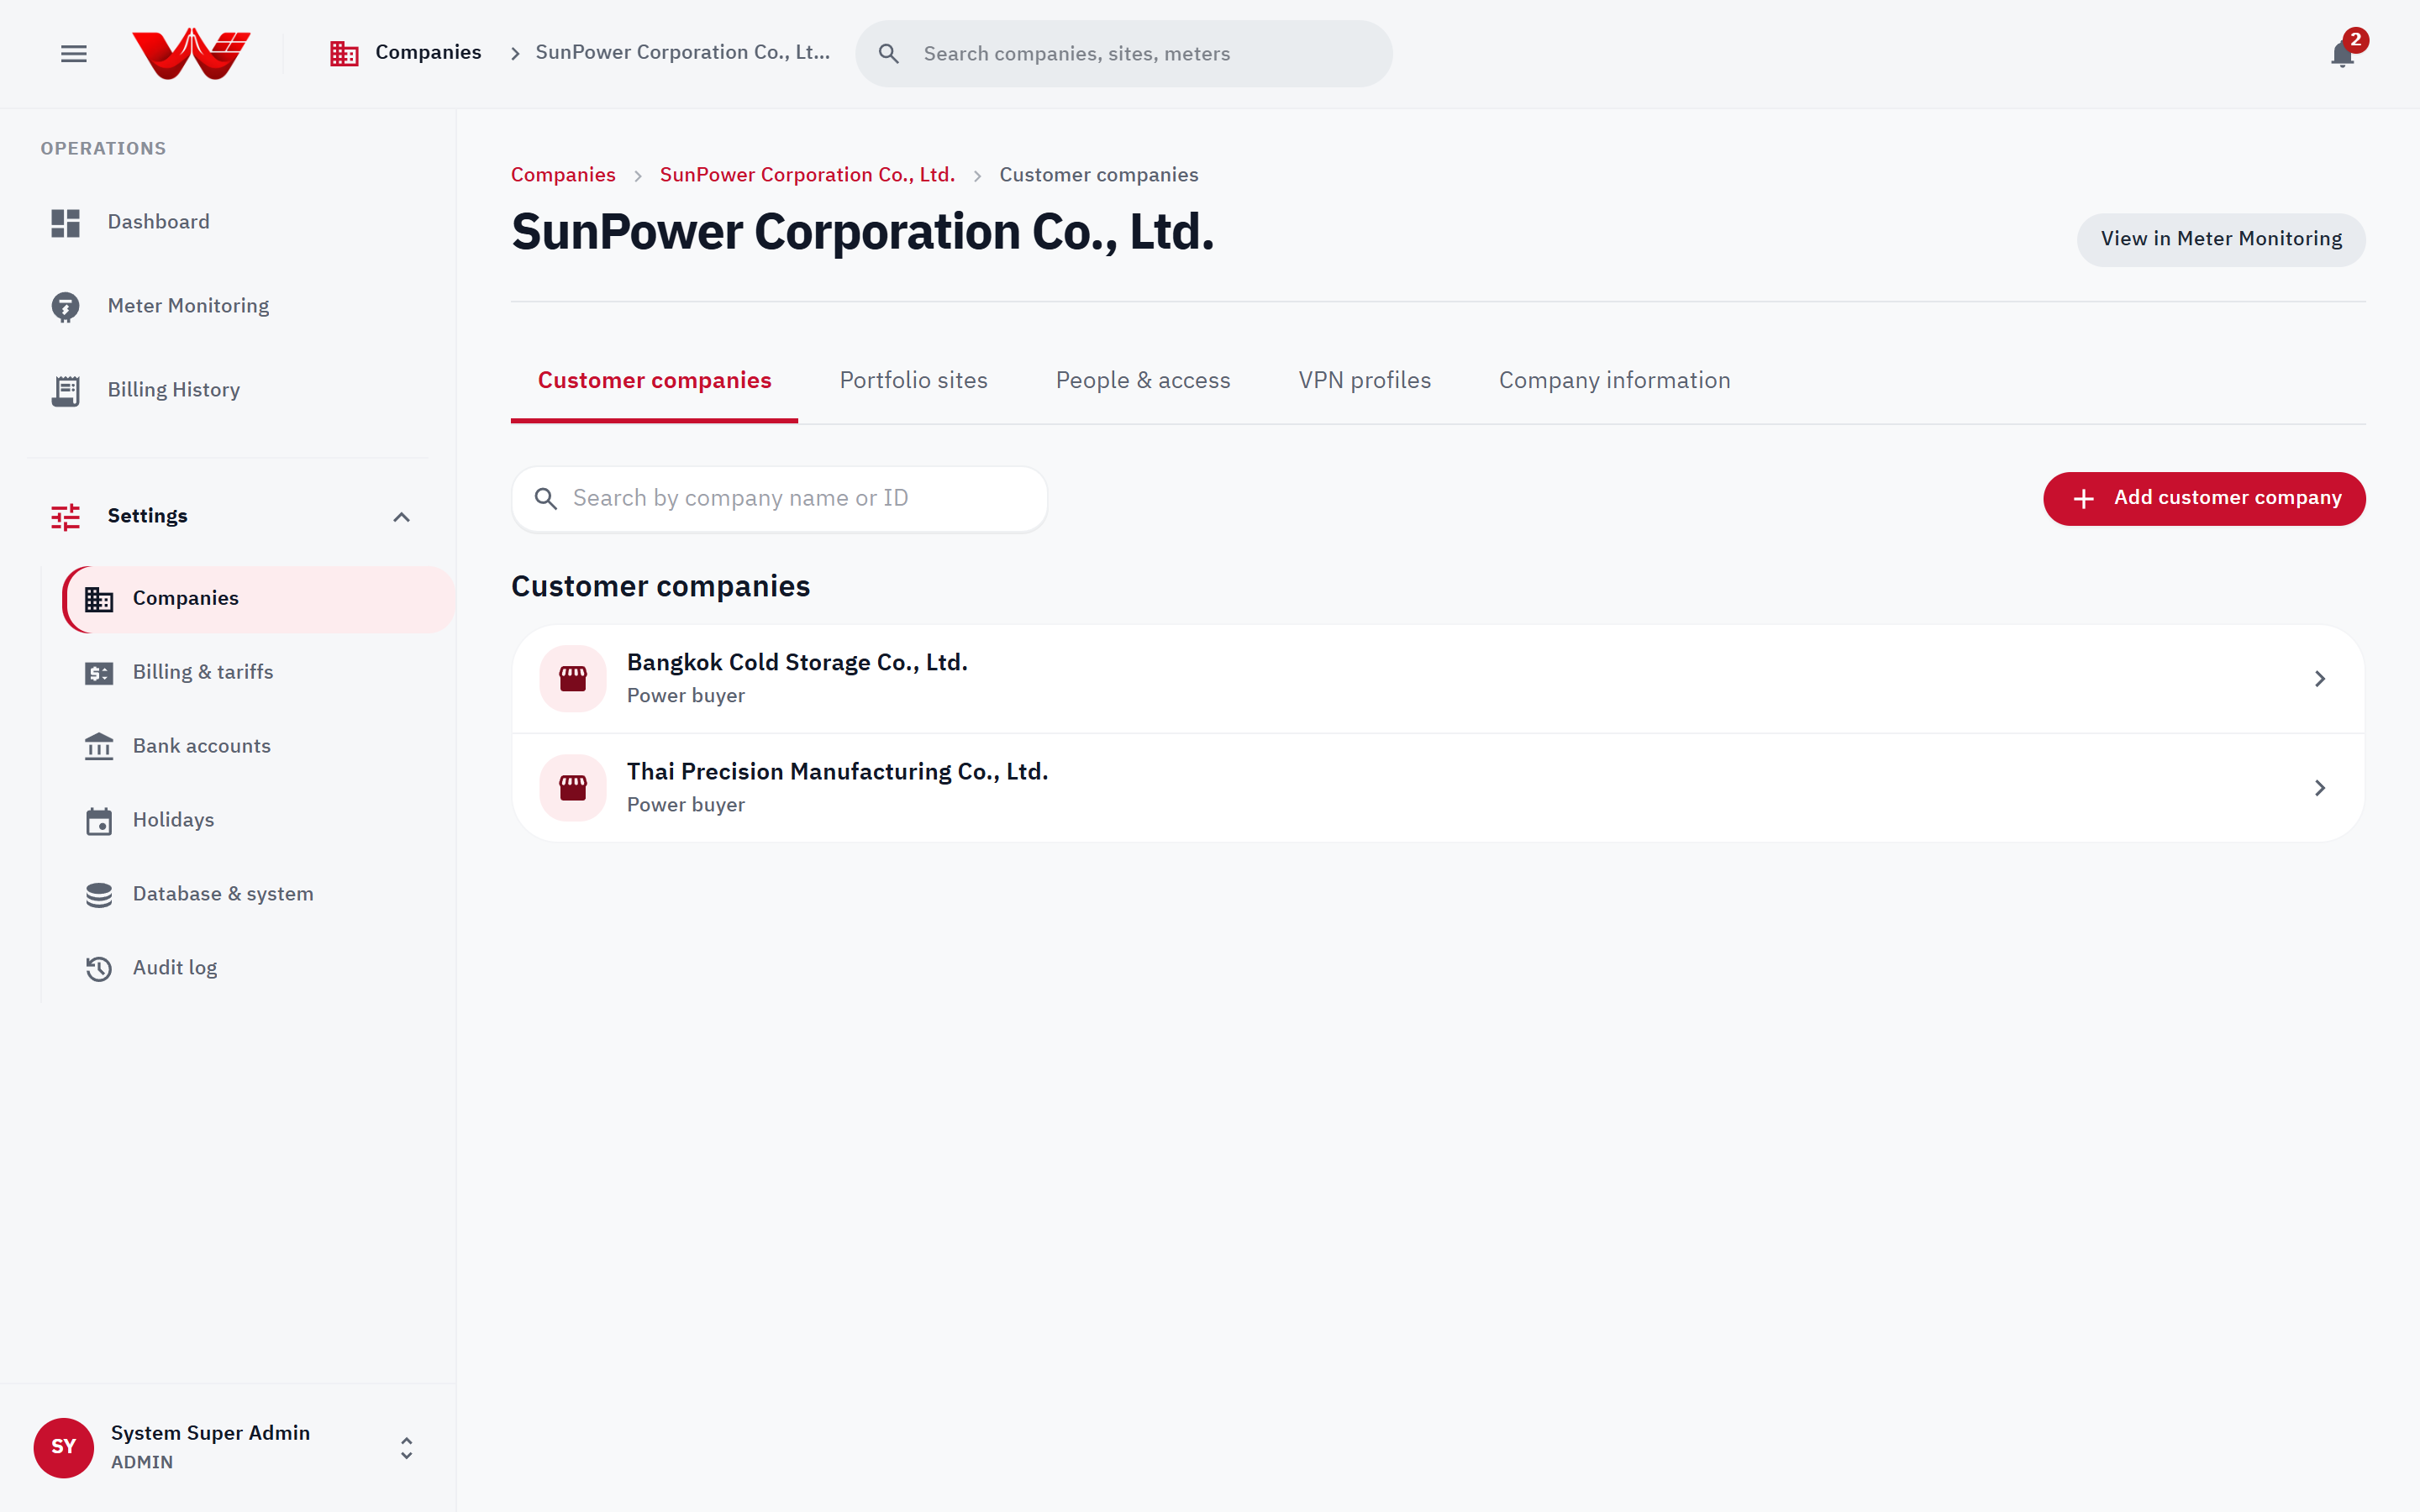
*Figure 2: Customer companies directory under a Solar Developer, with the Add customer company workflow.*
---
## 3. Guided Site, PPA Contract & Meter Setup
From either **Portfolio sites** or inside a customer company's **Sites** tab, click **Add site** to launch the 3-stage setup wizard: **1. Site & PPA** → **2. Meter** → **3. Check**.
### Stage 1: Site & PPA Contract (`Site & PPA`)
1. If started from your developer portfolio, choose the **Customer / off-taker** for this site *(or click **Add customer company** right from the form)*.
2. Enter **Site name** *(required)* and **Installed capacity (kWp)** *(used for clear-sky baseline curves on charts)*.
3. Configure PPA billing terms:
- **Contract discount (%)** (`0–100%`)
- **Billing cut-off day** (`1–28`, default `25`)
- **Payment term after cut-off (days)** (`0–120`, default `30`)
- **Electricity tariff** *(required)* and optional **Custom peak / off-peak rates (THB/kWh)** to override the schedule rate.
4. Click **Save and add meter**.
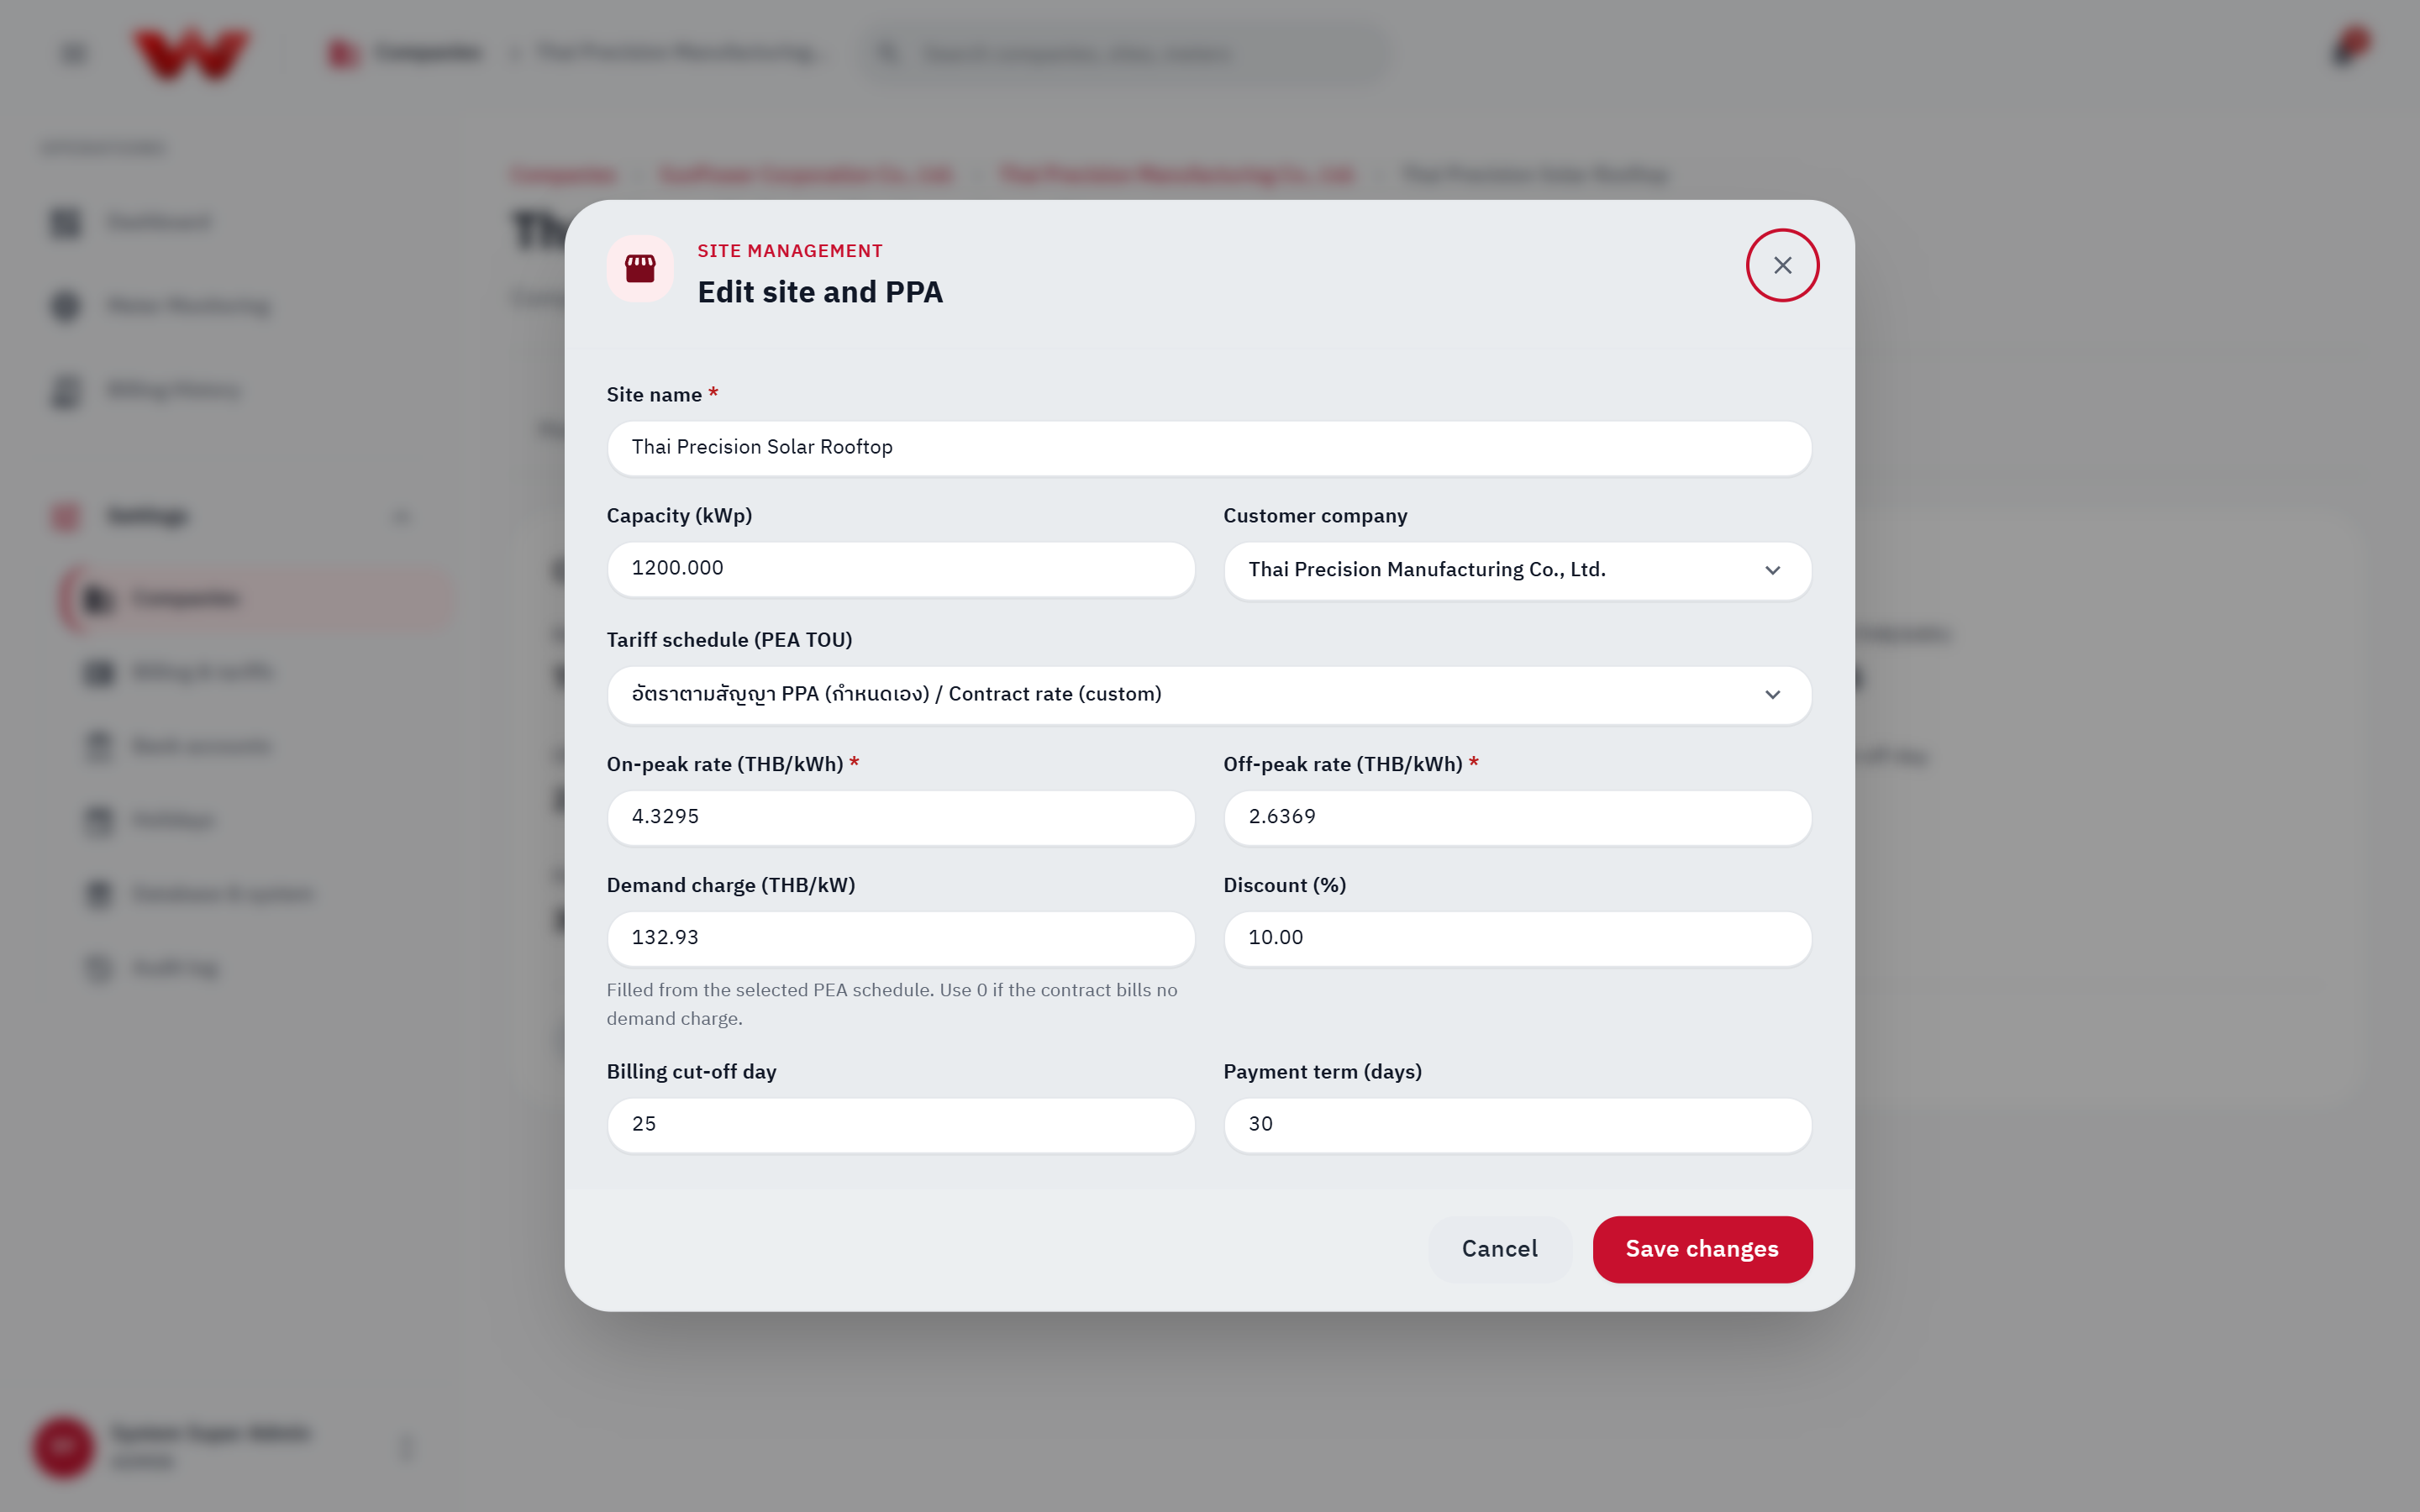
*Figure 3: Site and PPA contract configuration including PEA TOU schedule, peak/off-peak rates, demand charge, discount, and cut-off day.*
::: tip Editing Existing Sites & Prefilling Multi-Site Rollouts
- **Edit later:** Open the site > **PPA** tab > **Edit site and PPA** to adjust capacity, PEA TOU tariff, **Demand charge (THB/kW)**, discount, or payment terms. *(Only a Platform Administrator can reassign an existing site to a different customer company, and the billing cut-off day locks once the site has any non-rejected invoice.)*
- **Multi-site rollout:** On Stage 3 (`Check`), clicking **Add next site for this customer** automatically copies the previous site's PPA terms so you don't have to re-type them.
:::
### Stage 2: Registering Meters (`US-1.19` Automatic Serial Discovery)
1. In Stage 2 (**Meter**), or later from the site's **Meters** tab, click **Add meter**.
2. Fill in the communication and metering parameters:
- **Meter model:** `Saral 305`, `Premier 550`, or `Prometer 100`.
- **IP address / host** and **Port** *(default `4059`)*.
- **Connection type:** `Public fixed IP`, `Private APN (SIM)`, or `VPN (Mikrotik)`.
- **Communication format (Interface):**
- **HDLC:** Meter connects through a 4G modem or serial/IP converter.
- **WRAPPER:** Ethernet LAN cable plugged directly into the meter (e.g., Prometer 100 over Ethernet).
- *Not sure? Start with `HDLC` and run **Test connection**; if the host is reached but the meter times out without answering, switch to `WRAPPER`.*
- **Polling interval:** `15 minutes`, `1 hour`, `6 hours`, or `24 hours`.
- **Transformer ratios and multiplier (CT/VT):** Enter `CT Primary (A)`, `CT Secondary (A)`, `VT Primary (V)`, and `VT Secondary (V)`. The **Multiplier** is computed automatically.
- **Energy reading side:**
- `Primary side`: High-voltage side / meter already applies CT/VT multiplier.
- `Secondary side`: Low-voltage side / WattDee multiplies raw readings by the Multiplier.
3. During guided setup, keep **Start reading right after saving** checked so the meter is activated in HES and tested immediately. *(Outside guided setup, click **Activate in HES**, type the meter label/serial to confirm, and run **Test connection**.)*
4. Click **Save meter**.
5. Click **Next: check setup** to open **Stage 3 (`Check`)**, showing PPA status, `Meters reporting / registered`, and a reminder if the customer company has no portal users yet.
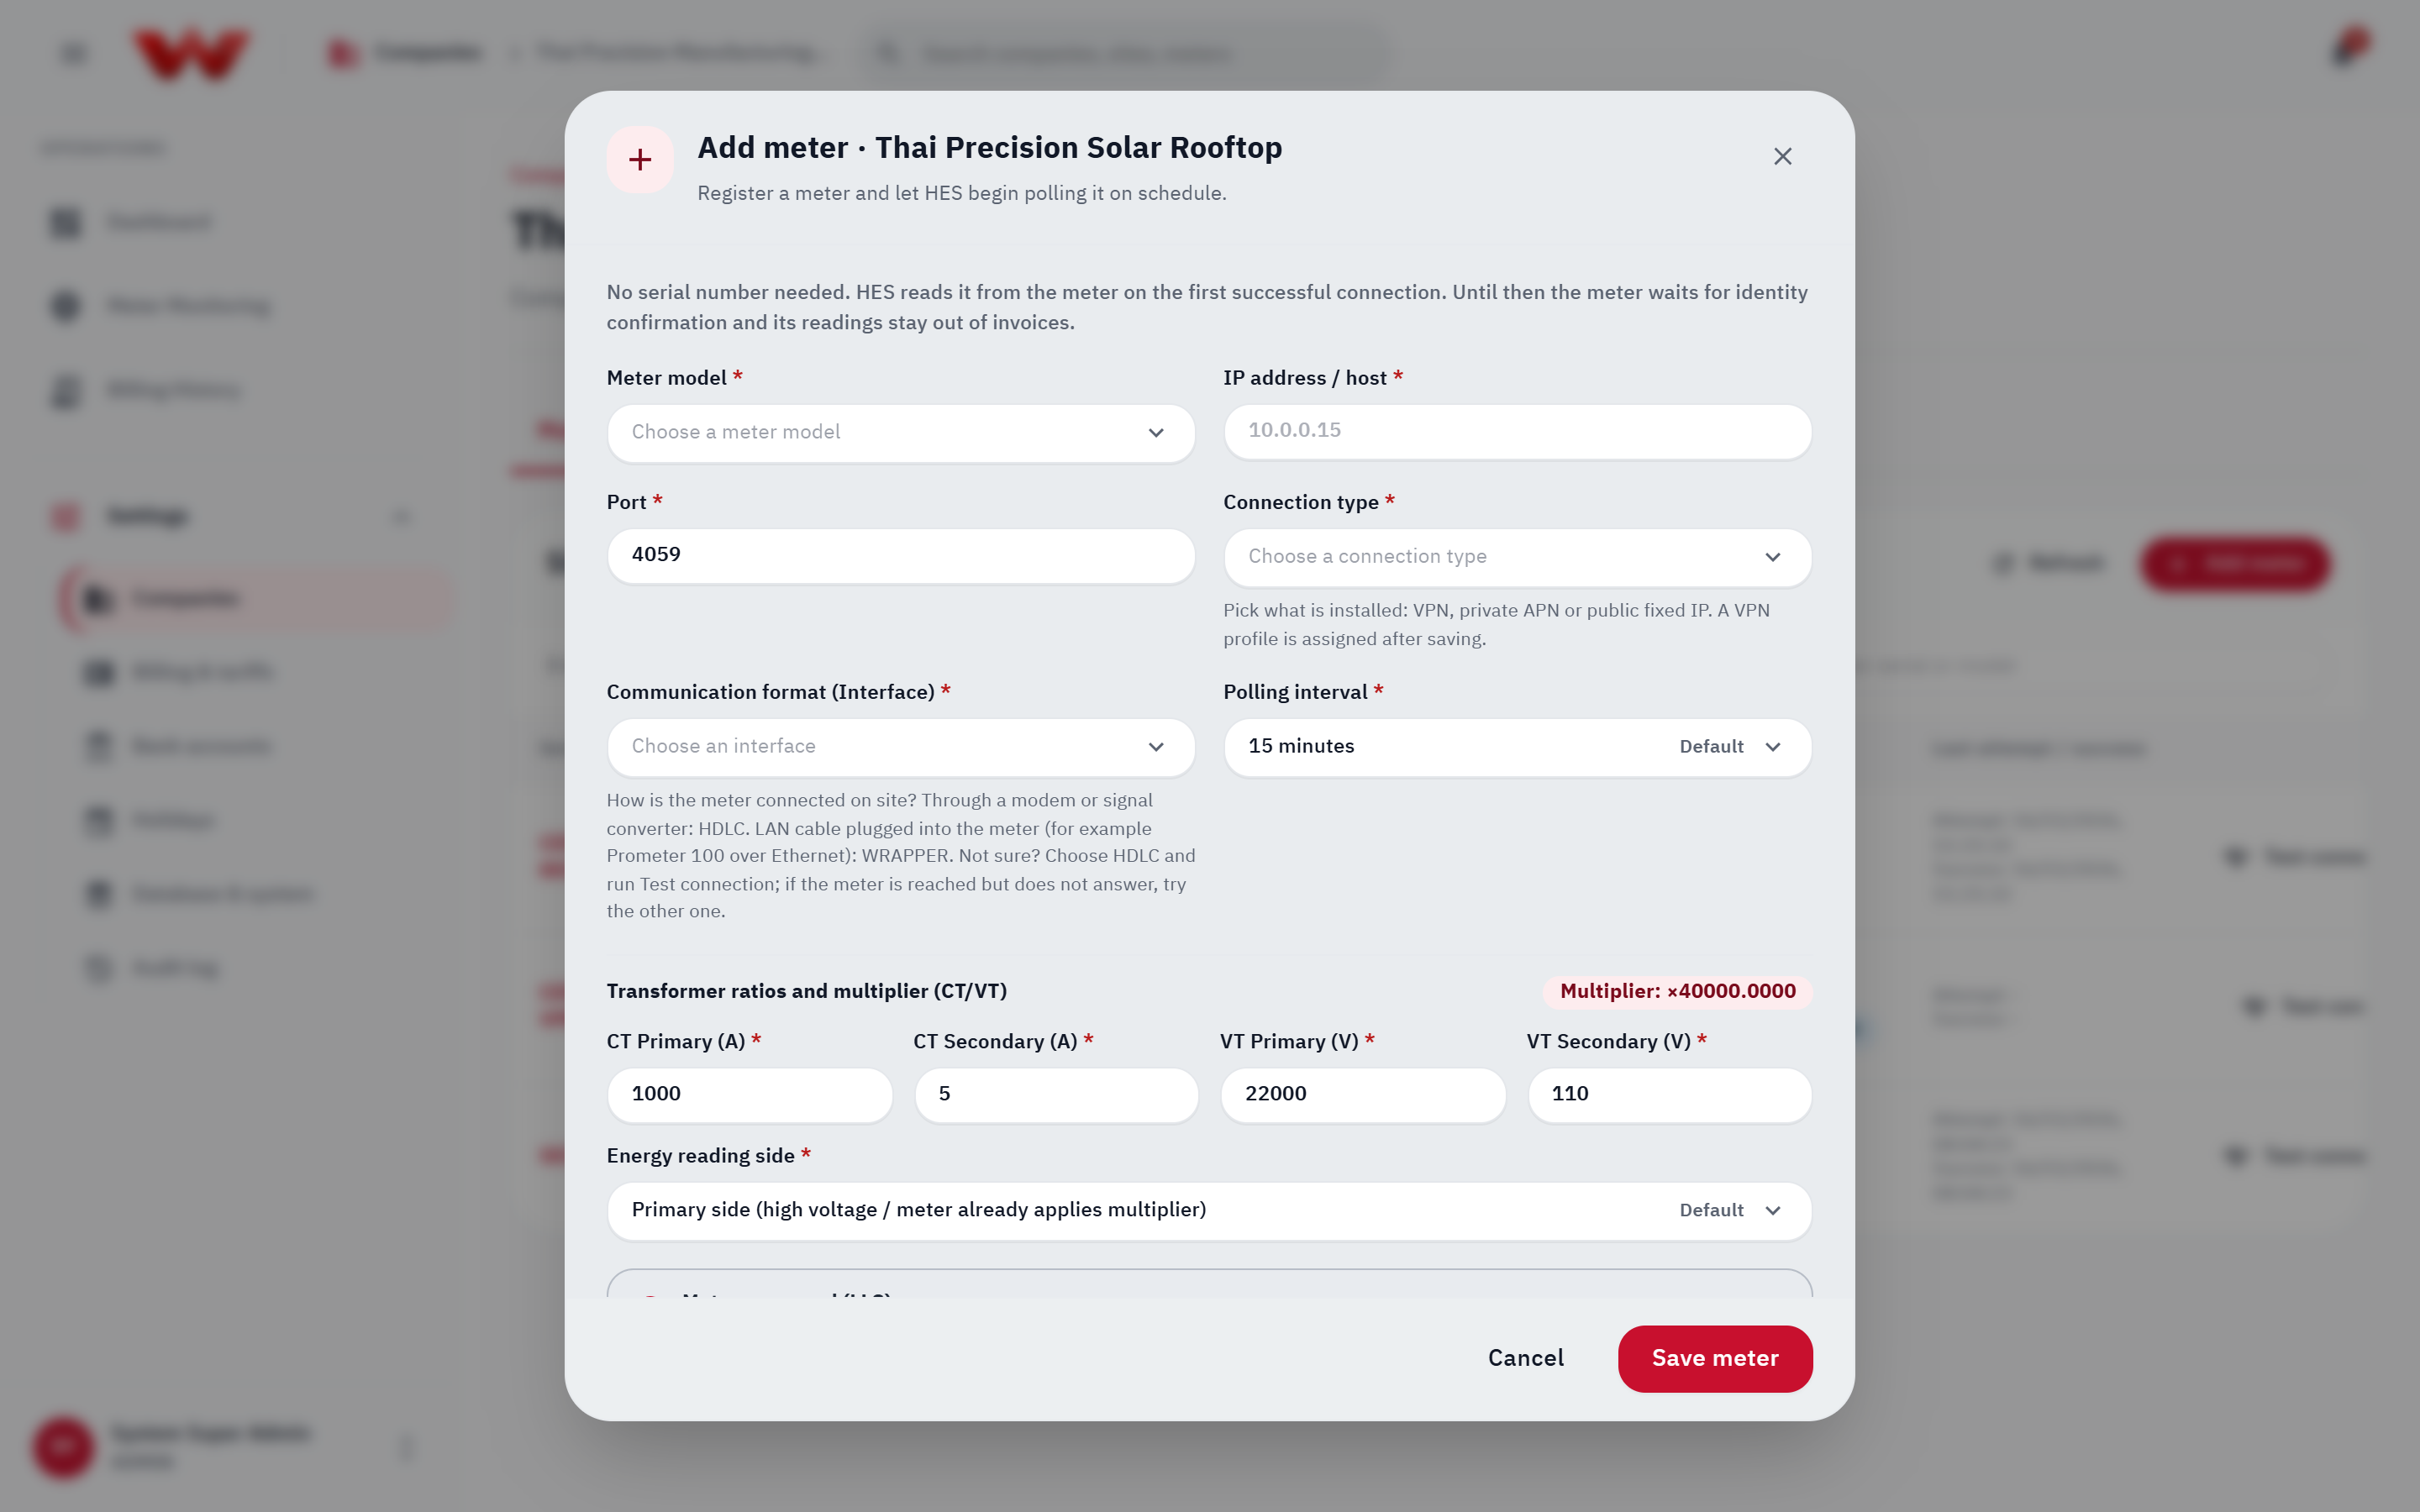
*Figure 4: Site meters list and registration form showing connection settings, CT/VT ratios, and activation state.*
::: info Important Rules for Serial Numbers & LLS Passwords (US-1.19)
- **No manual serial entry:** HES reads the serial number directly from the meter on its first successful connection. While waiting, the meter shows `Waiting for HES to read the serial. Not billed yet` and its intervals are kept out of invoices.
- **No LLS password entry in the portal:** Configure the meter's LLS password on the HES host (model secret or per-meter secrets file). If omitted, **Test connection** reports `config_error`.
- **Serial conflicts or suspected swaps:** If HES detects a duplicate serial or a mismatch against a registered meter, readings are held from billing (`Identity check failed` / `Duplicate` / `Suspected meter swap`). Contact your **Platform administrator** to verify the physical nameplate and run **Correct serial** or **Confirm swap** with an audit reason (minimum 5 characters).
:::
---
## 4. VPN Profiles & Meter Connectivity
WattDee supports **WireGuard**, **IPsec**, and **OpenVPN** profiles shared across a developer's sites.
::: warning Platform Permission Required for VPN Changes (`vpn.manage`)
Creating, editing, enabling/disabling VPN profiles and assigning meters under a site's **Connectivity** tab require the **Platform administrator** (`vpn.manage`) role. Developer admins coordinate profile details and assignments with the platform administrator.
:::
### Configuring a VPN Profile (Platform Admin in Developer Workspace)
1. Open the developer company in **Settings** > **VPN profiles**.
2. Click **Add VPN profile** (or select a profile and click **Edit settings**).
3. *(Optional)* For **WireGuard** or **OpenVPN**, expand **Import configuration**, paste the configuration text, and click **Review imported settings**.
4. Enter **Connection details**:
- **Connection name** and **Protocol** (`WireGuard`, `IPsec`, `OpenVPN`).
- **For WireGuard (Connection mode):**
- **We dial the site (`dial`):** Use when the site gateway has a static public IPv4. Enter **Peer IPv4 address** and **Peer port** (default `51820`).
- **The site dials us (`listen`):** Use when the site connects over **4G / CGNAT** without a public IP. Enter **Server UDP port** (`1024–65535`, default `51821`) and **ensure that UDP port is open in the server firewall** (no peer IP is required).
- **Allowed meter networks (CIDR):** e.g., `10.10.0.0/24` *(every meter assigned to this VPN profile must use an IP inside these CIDR blocks)*.
- Complete protocol-specific settings (WireGuard local tunnel CIDR, peer public key, keepalive; IPsec IKEv1/IKEv2, PSK or PEM certificates; OpenVPN transport UDP/TCP, server certificate name, PEM certificates, optional TLS Crypt).
- Check **Replace credentials** when rotating keys on an existing profile.
5. Click **Save VPN connection** and wait for the status tag to show **Tunnel established** (or **Runner ready**).
### Assigning a VPN Profile to a Site Meter
1. Open the target site > **Connectivity** tab.
2. Select the VPN profile, choose the meter from **HES meter**, and click **Assign meter**.
3. To detach a meter, click **Unassign** *(note: unassigning stops HES polling for that meter)*.
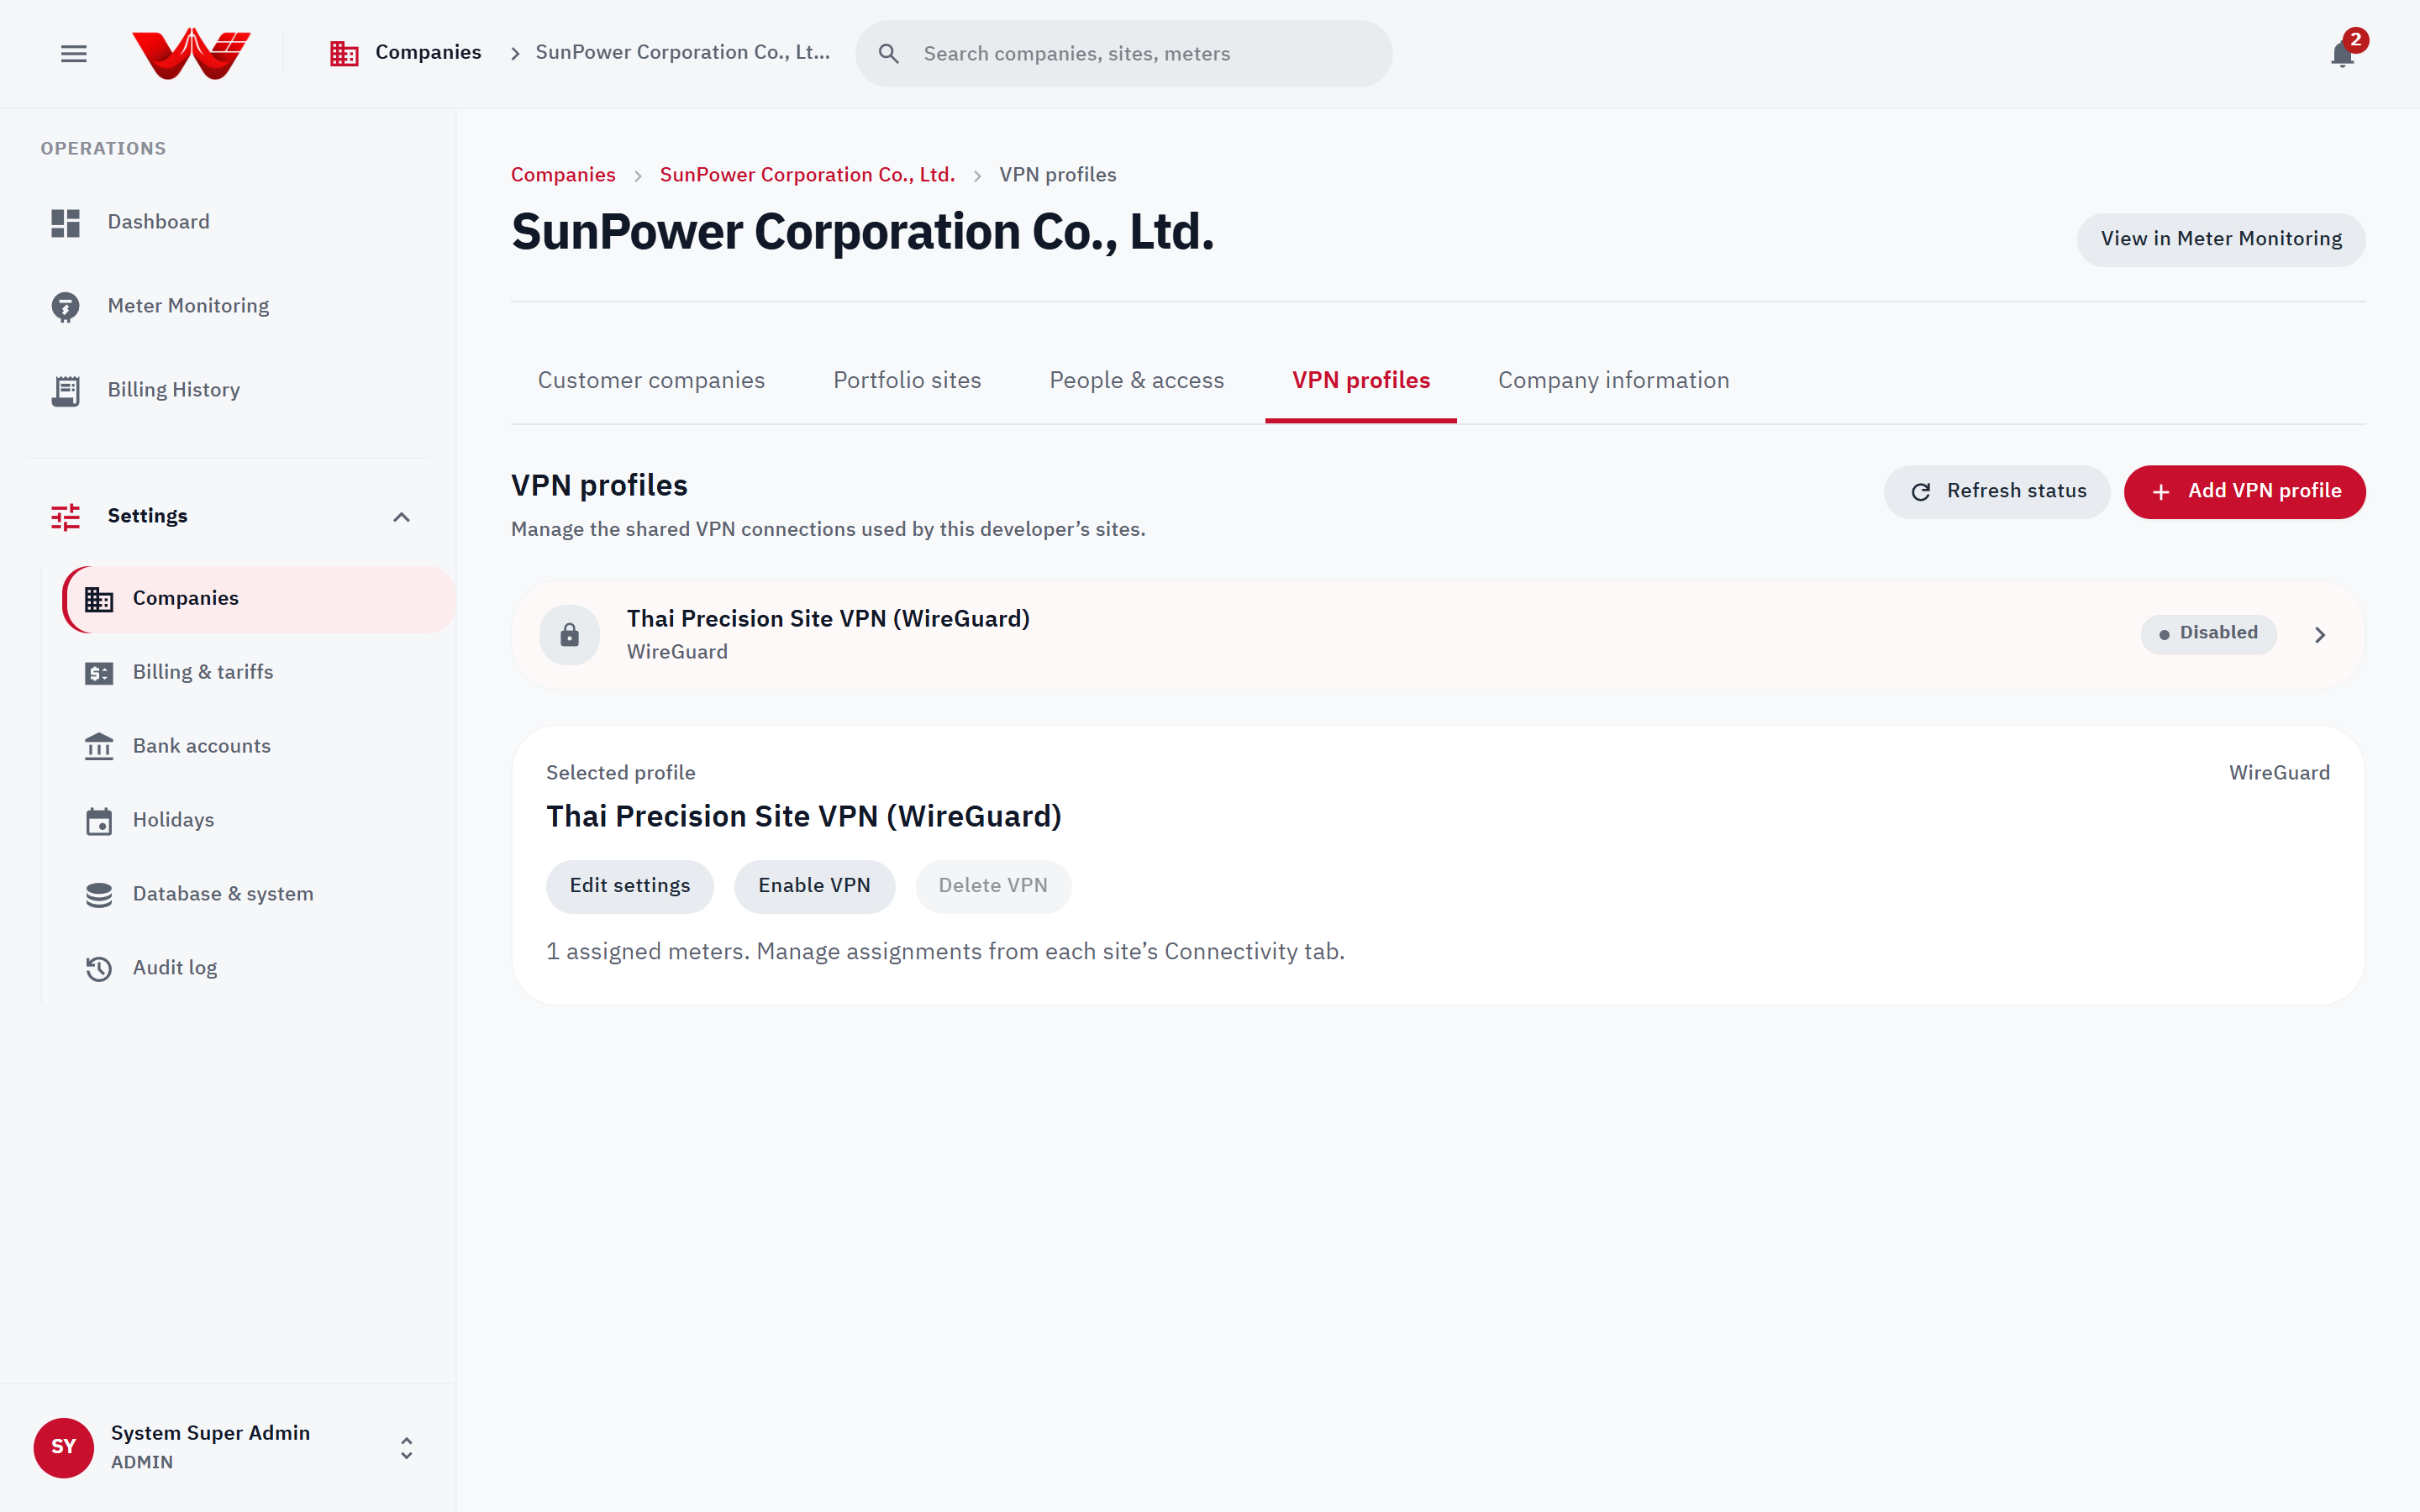
*Figure 5: VPN profiles management screen showing active tunnel statuses and protocol configuration.*
---
## 5. Managing Team Members & Customer Users (`People & access`)
Developer Administrators manage users inside both **their own developer company** and **their customer companies**.
1. Open **People & access** on the target developer or customer company.
2. Click **Add user**.
3. Verify **Organization** and enter **Full name** and **Email**.
4. Select the **Role** (available options match the company tier):
- **Solar Developer:** `Company administrator`, `O&M engineer`, `Accounting`, `System operator`
- **Customer Company:** `Customer administrator`, `Customer representative`, `Read only`
- *The **Access** box previews all sites the user will reach before you save.*
5. Set a **Password**: type a password meeting all 5 complexity rules, click **Generate secure password**, or leave blank to auto-generate a one-time temporary password (displayed once after creation).
6. Click **Add user**.
### Ongoing Account Management
- **View site access:** Inspect the paginated list of sites reachable by that user.
- **Edit / Reset password:** Click the edit icon > optionally enter a password or leave blank to auto-generate > click **Reset password** *(immediately signs the user out on every device; one-time temporary password is shown once)*.
- **Suspend account:** Immediately revokes access while preserving history and audit trails; accounts can be reactivated anytime.
- **Delete account permanently:** Located inside the Edit user dialog for permanent removal.
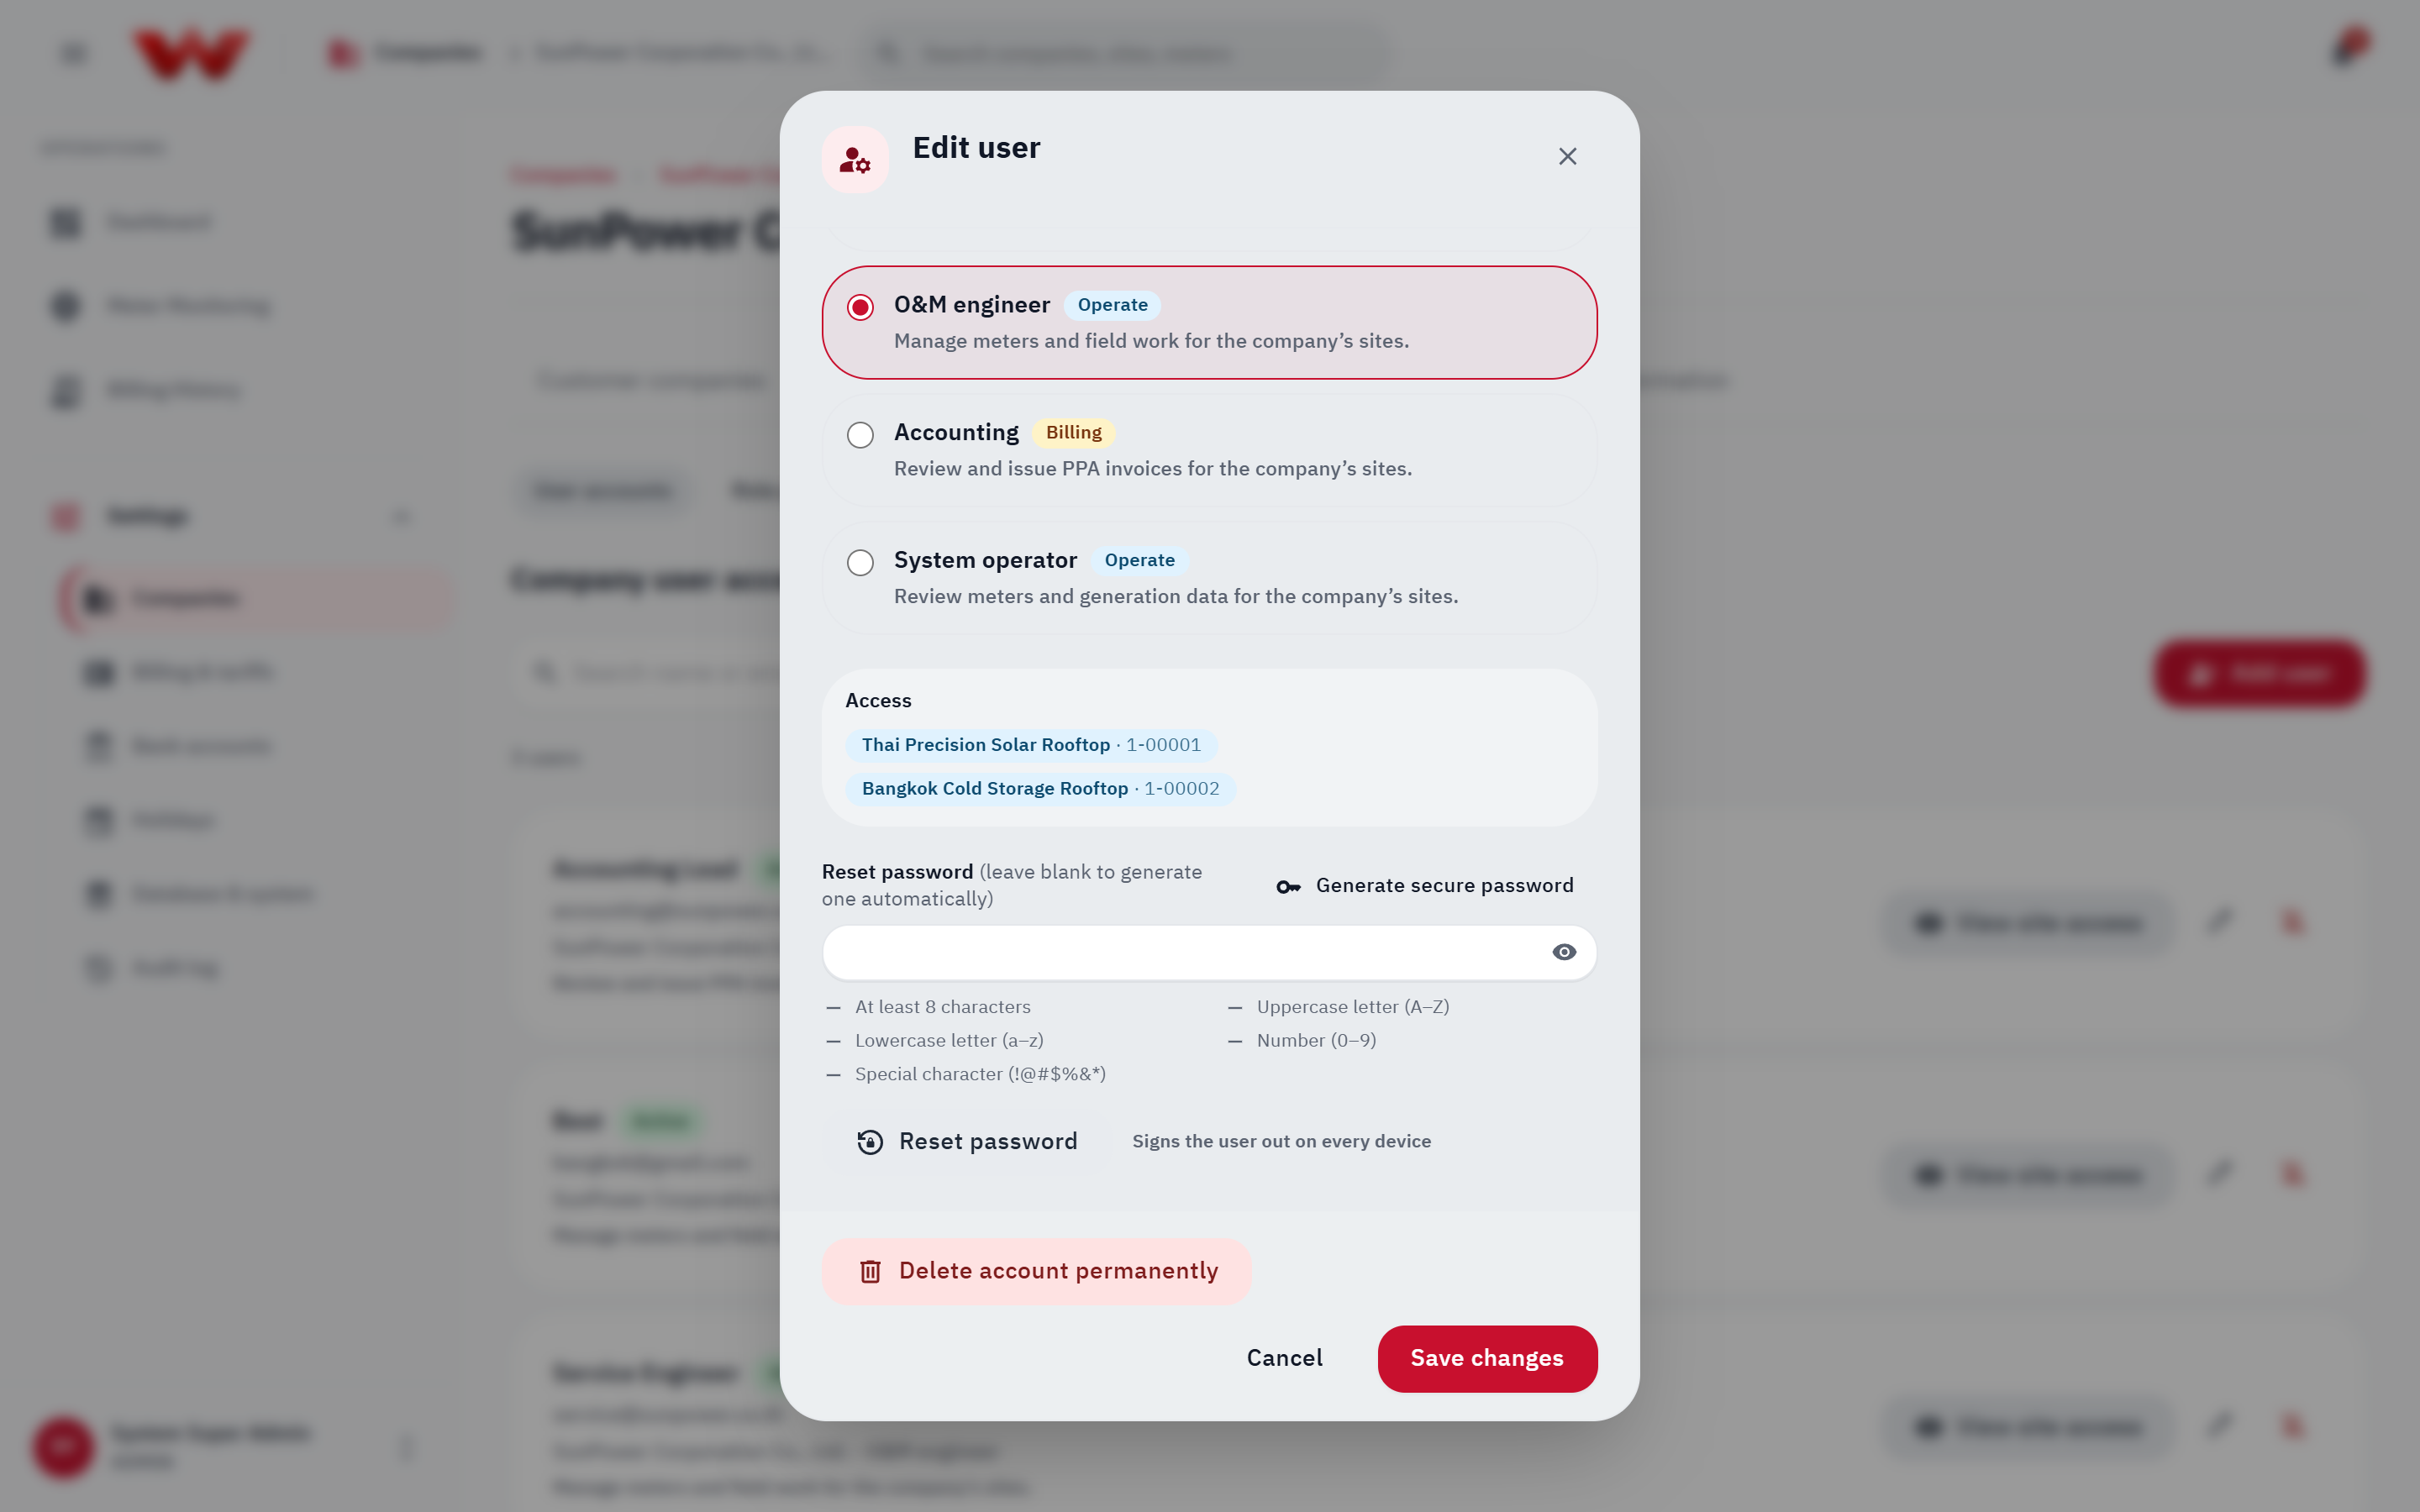
*Figure 6: People & access view listing company users, active/suspended status, roles, and site-access inspection.*
::: warning Built-In Governance Safeguards
- You **cannot change your own role or suspend your own account**, preventing self-escalation or accidental lockout.
- The **last active Administrator** of any organization cannot be demoted, suspended, or deleted.
- Only a **Platform administrator** can move an existing user from one organization to another.
:::
---
## Next Steps
- [Meter & Telemetry Guide: Fleet Monitoring, HES Diagnostics & VEE Repair](./05-meter-and-telemetry-guide)
- [Billing and 3-Tier Approval Guide](./06-billing-and-approval-guide)